
Ingredients:
- 50 egg roll wraps (i use the 20 count packages so i always have extras. just put the opened package in a zipper bag and)
Directions:
- - Heat the olive oil in a very large frying pan* and drop the pork cubes into it. Add 2 tablespoons of Teriyaki sauce, a pinch or two of salt and cook until well browned.
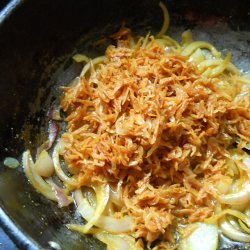
- - Add the shredded cabbage, bean sprouts, onions, garlic and carrots. Stir thoroughly and then add the remaining 2 tablespoons of virgin olive oil over the top. Stir thoroughly again. Other cooks like to mix the meat with the raw veggies and let the final frying cook the vegetables. However, I like to cook them a little first to get rid of some of the moisture (especially in the cabbage and sprouts). I have found that, if I get rid of some of the moisture first, the veggies will not shrink as much inside the wrapper later during frying and gives me a much firmer roll without large, empty pockets of air.
- - Sprinkle the Kosher salt, ginger and black pepper over the top. Add the soy sauce and stir until everything is evenly distributed.
- - Stir the mixture well several times until the cabbage becomes somewhat soft.
- - When the mixture has reached the desired consistency, turn off the heat and add the shrimp. Stir well and allow mixture to rest for about 10 minutes.
- - Have a small bowl of water ready. Take an egg roll wrapper out of the package; lay it flat so that one of the corners is pointing at your belly. Dip your fingers into the bowl of water and run them along all four edges of the wrapper so that they are all nice and moist.
- - Place (approximately) 2 to 3 tablespoons of the filling in the middle of the wrapper so that it forms an elongated hill that comes to about 1 inch from the left and right sides. Fold the bottom corner (the one near your belly) over the mixture and press the corner lightly into the middle of the wrapper. Fold the left and right corners of the rolled wrapper so they end up pointing at each other on top of the folded wrapper. Using slight pressure from your fingers, “roll” the wrapped mixture towards the top until you end up with your roll. Keep it as tight as possible as you roll but not too much or you may break the wrapper and it will be a mess when you fry it. (Holy Mung Beans, Batman! I hope that makes sense!).
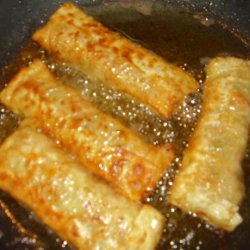
- - FOR FRYING: I use vegetable shortening or canola oil, whichever I have on hand at the time. I also use my deep fryer but, in a pinch, I have used a deep frying pan with enough frying oil in it to completely cover the egg rolls. I have also heard that peanut oil does a great job but I am a cheapskate and don’t want to spend the extra bucks.
- - Fry on medium-high heat. I have found that anything lower makes the wrappers a little soft and chewy and I like mine nice and crispy.
- - Now, you will find that egg rolls can be temperamental and some will follow basic orders but some won’t. As you fry a batch, you will find that some of your egg rolls have turned over by themselves and some have not. You will also find that some will stay in the position once you turn them but some will absolutely refuse to turn; it seems that no matter how many times you turn them, they will turn back leaving the whitish, uncooked belly exposed. For those rebels, you may need to turn them and hold them under the oil with your utensil until they stay turned.
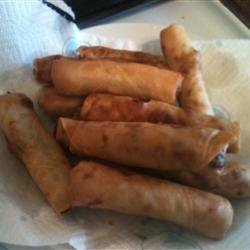
- - Fry until golden brown and “bumpy”. Place on top of a cookie sheet covered with a thick layer of paper towels and let them “drain” for 10 minutes or so. Serve and enjoy!
- *I use my big Paella pan (see picture) which requires three burners to use. Otherwise, you may need to cook the filling in a couple of batches if your frying pan is not big enough. At times, your frying pan may not appear to be big enough but, after the cabbage and bean sprouts cook for a few minutes, the mixture will shrink so you may be able to keep adding the fresh veggies slowly and cook it all in one batch.).
- HINT: When filling the egg rolls, I place my frying pan (or Paella pan) on a flat counter. Then, I place a piece of board about 1.5 inches thick under one side of the pan. This puts the pan on a slight angle which allows the juices and sauce to drain to the lower end. I then start using the filling from the higher side with a slotted spoon. This method allows me to use dryer filling without the sloppiness of wet cabbage.
Nutrition Facts
| Amount Per 1 Serving | |||
| Calories | 75.97 Kcal (318 kJ) | ||
| Calories from fat | 33.55 Kcal | ||
| % Daily Value* | |||
| Total Fat | 3.73g | 6% | |
|---|---|---|---|
| Cholesterol | 14.01mg | 5% | |
| Sodium | 526.62mg | 22% | |
| Potassium | 120.18mg | 3% | |
| Total Carbs | 6.46g | 2% | |
| Sugars | 1.31g | 5% | |
| Dietary Fiber | 1.05g | 4% | |
| Protein | 4.51g | 9% | |
| Vitamin C | 12.6mg | 21% | |
| Iron | 0.4mg | 2% | |
| Calcium | 16.2mg | 2% | |
| Amount Per 100 g | |||
| Calories | 118.54 Kcal (496 kJ) | ||
| Calories from fat | 52.34 Kcal | ||
| % Daily Value* | |||
| Total Fat | 5.82g | 6% | |
|---|---|---|---|
| Cholesterol | 21.87mg | 5% | |
| Sodium | 821.72mg | 22% | |
| Potassium | 187.52mg | 3% | |
| Total Carbs | 10.08g | 2% | |
| Sugars | 2.05g | 5% | |
| Dietary Fiber | 1.63g | 4% | |
| Protein | 7.04g | 9% | |
| Vitamin C | 19.7mg | 21% | |
| Iron | 0.6mg | 2% | |
| Calcium | 25.2mg | 2% | |
* Percent Daily Values are based on a 2000 calorie diet. Your daily values may be higher or lower depending on your calorie needs.
Find out how many calories should you eat.
Try this similar recipes
-
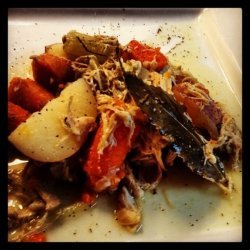
Heart Warming Chicken Stew
Onions, quartered, Garlic, peeled and 9 more.. -
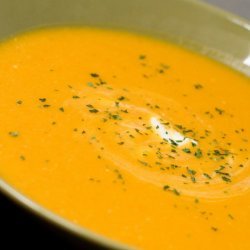
Carrot Soup
Olive oil, Onions, chopped, Minced garlic, Diced carrots and 7 more.. -

Egg Rolls
Minced fresh ginger (or more if you love ginger) and 11 more.. -

Grilled Salmon and Smokey Tomato-chipotle Sauce
Extra virgin olive oil, Chopped red onion, Minced garlic and 11 more.. -
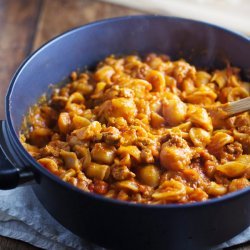
Pasta E Fagioli
Extra virgin olive oil (you ll need a bit more for drizzl... and 16 more.. -
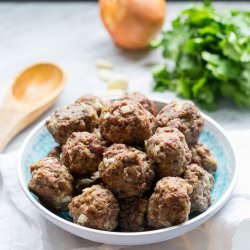
Make-Ahead Meatballs
Oil, Onion, diced, Garlic cloves, minced and 7 more.. -
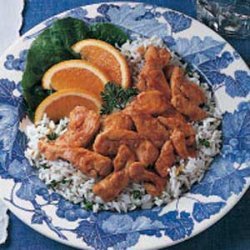
Indian Shrimp
Shrimp, Olive oil, Onion, chopped, Garlic, minced/crushed and 7 more.. -
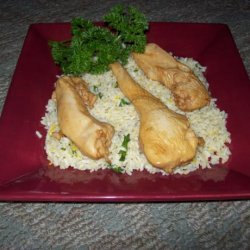
Garlic Chicken on Rice
Onion, chopped, Garlic cloves, large, minced, Lemon juice and 8 more.. -

Indian-Style Red Lentil Soup
Onion, chopped, Garlic cloves, finely chopped and 9 more.. -
Garlic Chicken on Rice
Chopped onion, Garlic cloves, minced, Lemon juice and 8 more.. -

Shrimp and Scallops Marinara
Jumbo shrimp, shelled and deveined, Bay scallop and 11 more.. -

Grilled Meatballs with Indian-Spiced Yogurt Sauce
Ground beef round, Red onion, minced, Garlic and 15 more.. -
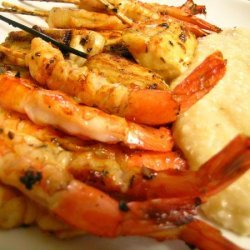
Barbecued Bourbon Shrimp With Cheddar Cheese Grits
Unsalted butter, Onion, cut into 1/4-inch dice and 21 more.. -
Middle Eastern Beef Kabobs
Beef tenderloin, trimmed and cubed into 16 pieces and 22 more..
Also Try
-

Lumpia - Filipino Shrimp and Pork Egg Rolls
Ground pork, Chopped raw shrimp, Chopped onion and 9 more.. -
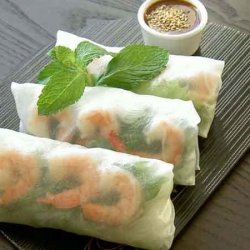
Pork and Shrimp Spring Roll (Goi Cuon) With Peanut Sauce (Nuoc L
Pork tenderloin, trimmed, Shallot, finely chopped and 26 more.. -

Best Pork And/Or Shrimp Egg Rolls
Peanut oil, Ground chinese ginger, Green onion, diced and 17 more.. -
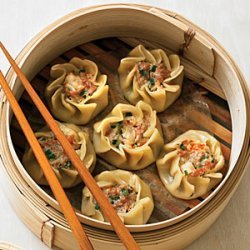
Asian Pork and Shrimp Spring Rolls
Fresh shrimp, peeled and deveined, Egg, lightly beaten and 12 more.. -

-
-

-
Pork & Shrimp Spring Roll With Peanut Sauce
Pork tenderloin, trimmed, Shallot, finely chopped and 25 more.. -
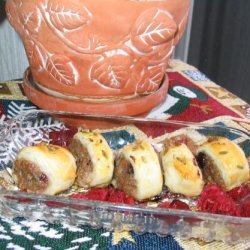
Pork and Cranberry Sausage Rolls
Ground pork (for americans ) or 500 g pork mince (for aus... and 10 more.. -
Get Your Recipe of Health!
Follow RecipeOfHealth on Facebook!
