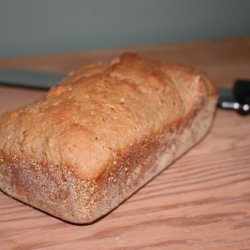
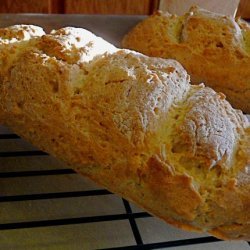
Healthy Gluten-Free Artisan Bread -- Free-Form Crusty Boule Recipe
Posted by

Directions:
- MIXING AND STORING THE DOUGH:.
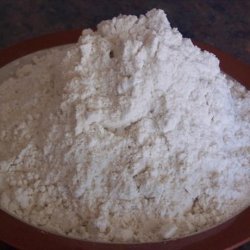
- Whisk together the flours, yeast, salt and xanthan gum in a 5-quart lidded Round Food Storage Container or the mixing bowl of your stand mixer (a metal mixing bowl should be fine as long as it is stainless steel).
- Combine the oil, honey and water; set aside.
- Dump the eggs into the dry ingredients and then stir while you pour in about 1/3 of the oil and water. (Unlike wheat doughs, we do not add all of the liquid at once and stir. If you do that it will result in a lumpy dough).
- Continue to stir while you pour in another 1/3 of the liquid; the dough will start to come together in a thick dough. NOTE: You can use your mixer for these steps with your bread hook rather than stirring the dough ingredients together.
- Add the final 1/3 of liquid and stir until the dough is nice and smooth. Cover container with the lid, but do not snap it shut. Allow it to rest on the counter for about 2 hours.
- Place the dough in the refrigerator and store for up to 7 days.
- NOTE: If you want to bake a loaf immediately after the initial proving you can bake it the first day, but you need to reduce the resting time before hand. In fact, you can mix the dough, shape it and let it rest on the parchment. After it has risen then slide it directly into the oven.
- BAKING DAY:
- On baking day take the bucket from the refrigerator. The dough will be quite fluffy still and you do not want to handle the dough too much. Just like our other doughs the trick is to keep as much of the air bubbles intact as possible.
- Use WET HANDS to remove a 1-pound (grapefruit-size) piece of dough from the bucket. In order to not handle the dough too much you can even scoop it out of the bucket with a slightly wet metal spoon.
- The dough will be quite scraggly when you take it out, just place it on a piece of parchment paper.
- Use wet hands to smooth out the surface of the dough and shape it as desired. DO NOT KNEAD. This may take dipping your hands in the water a few times…to get a nice shape. Gently smooth it out with wet hands into the shape you want.
- Cover dough loosely with plastic wrap and allow to rest on the counter for about 90 minutes. If your kitchen is very warm you may only need about 75 minutes.
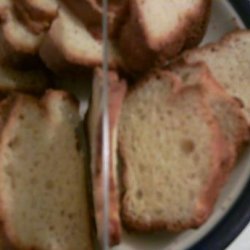
- The dough will not have grown much while resting, but it will seem a little bit puffier. Use a serrated knife to cut slashes in the dough.
- BAKING OPTIONS:.
- STONE OR COOKIE SHEET OPTION: If you want to bake using a baking stone, you can OR you can use a cookie sheet.
- Preheat oven to 450°F
- Place parchment paper with your prepared dough on prepared stone or baking sheet.
- Place a pan (not glass) under the baking stone or sheet (at least 4 inches away) and add a cup of hot water to it when you put the loaf in the oven to create steam.
- Bake at 450 degrees for 30 minutes.
- DUTCH OVEN OPTION: Preheat the oven with a 5 1/2 quart Dutch Oven in it to 500 degrees 30 minutes before baking time. (Be sure it is fitted with a metal Replacement Knob, the original plastic knobs can only be heated to about 400 degrees.)
- Remove the pot from the oven and take off the lid.
- Lift the bread on the parchment and VERY CAREFULLY lower the parchment and bread into the pot, replace the lid onto the pot.
- Return to the oven and bake for 20 minutes.
- After 20 minutes remove the lid, turn the heat down to 450F and bake for an additional 15 minutes.
- COOL THE BREAD:
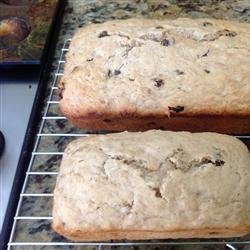
- Once the bread is done baking remove it from the pot using a spatula or from the stone/sheet and transfer to a baking rack to cool.
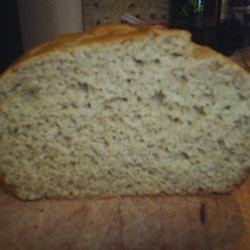
- ALLOW THE BREAD TO COOL COMPLETELY before eating or the center may seem gummy.
- The loaf is also wonderful toasted and served with butter and marmalade. Enjoy!
Nutrition Facts
| Amount Per 1 Serving | |||
| Calories | 753.75 Kcal (3156 kJ) | ||
| Calories from fat | 79.39 Kcal | ||
| % Daily Value* | |||
| Total Fat | 8.82g | 14% | |
|---|---|---|---|
| Cholesterol | 186mg | 62% | |
| Sodium | 950.98mg | 40% | |
| Potassium | 633.01mg | 13% | |
| Total Carbs | 156.77g | 52% | |
| Sugars | 24.68g | 99% | |
| Dietary Fiber | 19.6g | 78% | |
| Protein | 17.82g | 36% | |
| Vitamin C | 3.7mg | 6% | |
| Iron | 4.3mg | 24% | |
| Calcium | 48.8mg | 5% | |
| Amount Per 100 g | |||
| Calories | 198.53 Kcal (831 kJ) | ||
| Calories from fat | 20.91 Kcal | ||
| % Daily Value* | |||
| Total Fat | 2.32g | 14% | |
|---|---|---|---|
| Cholesterol | 48.99mg | 62% | |
| Sodium | 250.49mg | 40% | |
| Potassium | 166.73mg | 13% | |
| Total Carbs | 41.29g | 52% | |
| Sugars | 6.5g | 99% | |
| Dietary Fiber | 5.16g | 78% | |
| Protein | 4.69g | 36% | |
| Vitamin C | 1mg | 6% | |
| Iron | 1.1mg | 24% | |
| Calcium | 12.9mg | 5% | |
* Percent Daily Values are based on a 2000 calorie diet. Your daily values may be higher or lower depending on your calorie needs.
Find out how many calories should you eat.
Try this similar recipes
-
Outback Steakhouse Copycat Bread (Gluten Free)
Tapioca flour, Garbanzo flour, Cornstarch and 13 more.. -
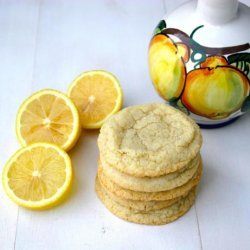
Lemony Rolled Sugar Cookies
Brown rice flour, Rice flour, Sorghum flour, Tapioca flour and 11 more.. -

Gluten-Free Strawberry Shortcake
Brown rice flour, Cornstarch, Tapioca flour, Baking powder and 8 more.. -
Rice Flour Muffin Mix
Brown rice flour, Potato starch, Tapioca flour, Sugar and 4 more.. -
Easy Grain Free Bread Ready in 35 Minutes
Rice flour, Sorghum flour, Baking powder, Baking soda and 5 more.. -
Gluten Free Waffles
Brown rice or 1 cup rice flour and 8 more.. -
Pineapple Upside Down Cake (Gluten Free)
Rice flour, Red mill gluten-free all-purpose baking flour and 13 more.. -

Cinnamon-Raisin Muffins with Streusel Topping
Chopped walnuts, Light brown sugar and 18 more.. -
Gluten-Free Pecan Pumpkin Cake
Sugar, Canned pumpkin, Canola oil, Egg whites, Egg and 15 more..
Also Try
-

Gluten Free Crusty French Bread Variation
Rice flour, Tapioca starch, Cornstarch, Acorn flour and 9 more.. -
-
-
Gluten Free Triple Coconut Muffins Delicious and Healthy
Coconut flour, Sea salt, Baking soda, Eggs, Coconut milk and 4 more.. -
-

Gluten Free, Dairy Free, Egg Free & Yeast Free Carrot Muffin
Soy flour or 1 cup any type flour, White sugar and 9 more.. -
-
-
-

Get Your Recipe of Health!
Follow RecipeOfHealth on Facebook!
