Directions:
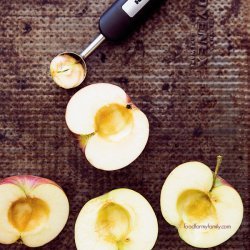
- Make a 12 cup batch of peeled, cored, pared, and thinly sliced apples. I got 16 slices out of each apple. As you process the apples place them in a bowl with some water, salt, and vinegar to keep them from changing color. This will be enough for two pies. I use a Dutch oven with deep steamer basket. Pour apples and soaking water into the steamer basket so the salted vinegary water will be used to steam the apples. Steam for 4 minutes and let set in the steamer off the flame for another 2 minutes. The perimeter apples will be soft but the ones in the middle still chewy. Transfer apples to a bowl to cool. Discard the steamer water. Sprinkle a little lemon juice over the apple slices and toss to coat. This also keeps the apples from turning color. I didn’t measure the lemon juice, just tipped up the bottle of RealLemon juice with my finger over the spout and used it like a salt shaker.
- In a large sauce pan over a medium low heat, bring the filling ingredients to a bubble except for the apples , water and flour. Add the apples, leaving the flame at medium low, and cook for 10 minutes, starting the timer when the solution starts to bubble again, stirring frequently. Make a paste stirring the flour and water together with a fork then add it to the apple filling. Stir for 1 minute constantly. Remove from heat and into a bowl to cool. This filling is for two pies. You can divide it up now if you wish or are only making one pie. When cool, cover and chill.
- This recipe calls for a double crust. Actually there is enough pie filling for two pies. If you have the counter space and refrigerator space and the inclination to make two pies, have at it. This ingredient list is for a single crust. So make it twice or double the ingredients and make both crusts at once. I find it easier making dough for 1 crust at a time in a small food processor.
- Fill a quart measure with ice then water and keep it in the fridge until ready to use.
- Combine the flour, sugar and salt in a bowl with a whisk. Locate the knife blade in a small food processor bowl. Transfer flour mix to the processor bowl. Cut the butter stick into 32 pieces and transfer to the processor bowl. Pulse 3 to 5 times to cut butter into flour until it resembles small peas to coarse meal. Small peas is better.
- Measure out 1/4 cup ice water and trickle it into the food processor while running. The food processor! The food processor is running, not you. Stop the trickle and food processor as soon as the flour mixture starts to pull away from the knife and before it makes a full ball on the side of the bowl. The dough will be in about 3 or 4 raggedy clumps. You will more than likely not use the full 1/4 cup measure of water, but use as much water as you have to.
- Dump the dough on a lightly floured surface, flour your hands, bring the dough together and knead it 3 to 5 times. Pat it out while rounding the dough to form a 4 to 5 inch hockey puck. It’s easier to roll the dough out round when you start with a round shape to begin with. Wrap it in plastic wrap and let it rest in the fridge for 2 hours or overnight. Make the recipe again for the second crust.
- Put an empty 9” pie pan in the fridge which you intend to use. It’s a nice place to store the dough rounds and it chills the pan.
- Have a nice tall drink of ice water. The filling is chilling. The dough is chilling. You’re all ready to make pie in the morning.
- Remove one dough round from the fridge and let it warm up to a malleable temperature, about 15 minutes. Lightly dust the work surface and rolling pin. Roll out the dough to a 12” circle, working quickly with a light touch, rolling the dough from center outward away from you, rotating the dough as necessary to keep the dough rounded and unstuck from work surface. Add small amounts of flour as necessary. If the dough starts to become too sticky, transfer it to a cookie sheet and into the fridge long enough for the butter to re-solidify; about 20 minutes, then finish rolling it out.
- With the bottom crust rolled out, transfer it to the pie pan. Working around the perimeter, lift the dough edge from the pie pan edge to let it sag into position in the transition from bottom to side of the pan. Lightly press the dough against the edge of the pan. Roll the rolling pin across the edge of the pan to trim off the extra dough. Gather the trimmings, wrap and refrigerate. They will be used to make decorations later. Cover and refrigerate the bottom crust.
- Locate baking rack in the bottom third of the oven; preheat to 425*F. Remove bottom crust from fridge and dock the crust using the tines of a fork on the bottom and side to let out air during baking. Place a baking blind on the crust. I use parchment paper and lima beans since I don’t like lima beans. Bake the crust for 10 minutes. Reduce oven temperature to 350*F. Remove baking blind; dock the crust some more and bake for 5 more minutes. Make an egg wash while the crust is baking; 1 egg beaten with 1 tablespoon water. Dock any parts of the crust that appear to be bubbling up and brush the bottom and side of the crust with the egg wash. Bake crust for 5 more minutes. Total bake time 20 minutes. Set crust aside to cool.
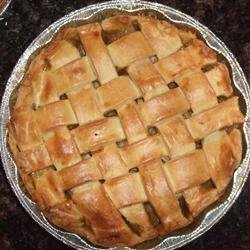
- Preheat oven to 400*F. Remove top crust dough round from fridge; lightly dust work surface. Roll out dough to a 12” round when the dough becomes malleable. Place filling onto the bottom crust and center the top crust onto the pie. Roll the edge of the pie with the rolling pin to trim off excess dough. Put the excess dough with the rest of the excess dough.
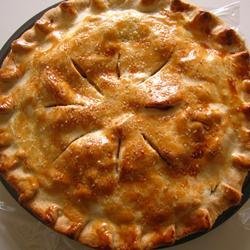
- Using a fork; work around the perimeter of the pie, pressing down on the edge of the dough with the fork tines drawing it to you. This seals the pie and makes a nice pattern on the crust. Using the fork tines create several vent holes in the top of the crust, alternately make 3 slits in the crust with a knife. Brush the top crust with egg wash, excluding the edge.
- Roll out the dough trimmings. Using a 2” or smaller biscuit cutter; cut out 2 rounds side by side then overlap a third cut on the 2 side by side cuts, creating apple slice patterns and leaf patterns. Arrange the decorations on top of the pie and brush with egg wash. Sprinkle top crust with a hand full of sugar. Large crystal is better.
- Place three measures of tin foil on a baking sheet at angles so they can be drawn up over the edge of the crust to keep it from browning too much and place the pie in the center.
- Bake in the lower third of the oven for 30 minutes. Curl tinfoil up over the pie edge and bake for 30 more minutes. Remove to a wire rack to cool.
Nutrition Facts
| Amount Per 1 Serving | |||
| Calories | 660.95 Kcal (2767 kJ) | ||
| Calories from fat | 170.88 Kcal | ||
| % Daily Value* | |||
| Total Fat | 18.99g | 29% | |
|---|---|---|---|
| Cholesterol | 40.79mg | 14% | |
| Sodium | 481.45mg | 20% | |
| Potassium | 75.69mg | 2% | |
| Total Carbs | 103.8g | 35% | |
| Sugars | 35.96g | 144% | |
| Dietary Fiber | 1.42g | 6% | |
| Protein | 17.33g | 35% | |
| Vitamin C | 0.2mg | 0% | |
| Vitamin A | 0.1mg | 5% | |
| Iron | 0.7mg | 4% | |
| Calcium | 50.7mg | 5% | |
| Amount Per 100 g | |||
| Calories | 144.48 Kcal (605 kJ) | ||
| Calories from fat | 37.35 Kcal | ||
| % Daily Value* | |||
| Total Fat | 4.15g | 29% | |
|---|---|---|---|
| Cholesterol | 8.92mg | 14% | |
| Sodium | 105.24mg | 20% | |
| Potassium | 16.54mg | 2% | |
| Total Carbs | 22.69g | 35% | |
| Sugars | 7.86g | 144% | |
| Dietary Fiber | 0.31g | 6% | |
| Protein | 3.79g | 35% | |
| Iron | 0.2mg | 4% | |
| Calcium | 11.1mg | 5% | |
* Percent Daily Values are based on a 2000 calorie diet. Your daily values may be higher or lower depending on your calorie needs.
Find out how many calories should you eat.
Get Your Recipe of Health!
Follow RecipeOfHealth on Facebook!

