
Ingredients:
- approximately 2 lb classic puff pastry, recipe follows (or frozen)
- pastry cream, flavored , recipe follows
- confectioners' sugar , for dusting
- suggested presentation: sugar cage, recipe follows
- 1/2 vanilla bean
- cooking spray
Directions:
- Preheat the oven to 400 degrees F.
- On a lightly floured work surface, roll the puff pastry into a 6 by 12-inch rectangle 1/8-inch thick. Place on a parchment-lined sheet pan and place another sheet pan on top of it. Bake between the 2 sheet pans until it barely begins to take on color, about 10 minutes. The puff pastry may rise unevenly in sections. If that happens, release the air by gently piercing the dough with the tip of a paring knife. Mix the corn syrup and water together. Remove the puff pastry from the oven and brush the top with the corn syrup mixture. Cover with another sheet of parchment paper and flip over the puff pastry. Peel off the parchment paper that is now on top and brush this side with the corn syrup mixture.
- Using a sharp paring knife and a plate as your guide, cut about a 10-inch circle from the half-baked puff pastry. Discard the excess dough. I cut the circles when the dough is half-baked so they will keep their shape. Reduce the oven temperature to 350 degrees F. Place the puff pastry circle back in the oven and continue to bake until crispy and golden brown, about another 15 minutes. Remove from the oven and place on a wire rack until completely cooled.
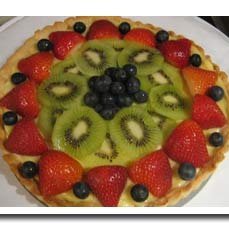
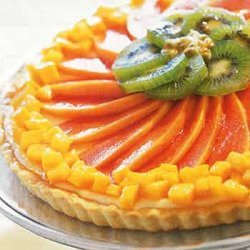
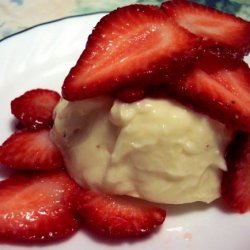
- Using a pastry brush, coat one side of each cooled circle with the tempered chocolate and allow the chocolate to set at room temperature, about 5 minutes. This layer of chocolate keeps the tarts from getting soggy. When the chocolate has set, spread about 2 tablespoons of pastry cream on each tart shell on top the chocolate coating. Cover with assorted sliced fresh fruit. It looks best to arrange the fruit in a sunburst pattern, fanning each type of fruit from the center of the circle toward the edge. Sprinkle the tops of the tarts with powdered sugar right before you serve them. A great finish for this dessert is a sugar cage over the top.
- For the Classic Puff Pastry: Place the flour, salt, melted butter, and most of the water in the bowl of a stand mixer fitted with the paddle attachment. Mix on medium speed for about 1 minute. Stop the mixer as soon as the ingredients begin to form a dough and pull away from the side of the bowl. If the dough appears too dry and does not come together, add the remaining water and mix just until combined. Do not over mix or you will over-develop the gluten. It is very important to keep gluten development to a minimum in this recipe, or the finished puff pastry will be tough and chewy instead of delicate and crispy. Remove the dough from the mixer and pat it into a 5-inch square about 2-inches thick. Wrap the dough completely in plastic and let it rest in the refrigerator for 2 hours. Resting the dough allows the gluten strands that have developed to relax.
- Work the cold butter into a square that is about a third smaller than the dough square, and about 1-inch thick. Place the butter on a lightly floured work surface and, keeping it square shaped, use a rolling pin to give it a few quick raps. This will soften the butter. It should be about the same consistency as the puff pastry dough. Lightly flour the butter and rolling pin as needed to keep it from sticking.
- Remove the dough from the refrigerator and place on a lightly floured work surface. Use the rolling pin to make a mark about 1-inch from each corner of the dough. Roll only this part of each corner away from the center of the dough until it is 1/4-inch thick. The center of the dough should be about 1-inch thick. Place the butter square in the center of the dough square. Pull the rolled-out corners up and over the butter, completely enclosing it in a dough package. When the butter has been added, the dough is referred to as a paton.
- The paton is now ready to be folded. You will need to give the dough six single folds, allowing the dough to rest in the refrigerator for at least 2 hours after every 2 folds. To begin, use a rolling pin and roll the paton into a 10 by 23-inch rectangle. Try to keep it an even thickness. Place the dough horizontally in front of you so it will be easier to fold. Fold the dough in thirds by first folding the left end over the middle and then folding the right third over it. Rotate the dough to make sure the seam is on your right. This is known as a single fold, or a letter fold because it resembles the way a letter is folded. Repeat the single fold starting with a 10 by 23-inch rectangle placed horizontally in front of you. To show that you have folded the dough two times, make two indentations in the dough with your fingertips. At this stage, the puff pastry must be kept well wrapped in the refrigerator for a minimum of 2 hours or up to 1 day.
- Remove the dough from the refrigerator and give it two more single folds, starting each time with a 10 by 23-inch rectangle. Make four indentations in the dough with your fingertips representing the four folds. At this stage, the puff pastry must be kept well wrapped in the refrigerator for a minimum of 2 hours or up to 1 day.
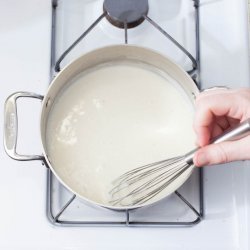
- For the Pastry Cream: Sift together the cornstarch and 1/4 cup of the sugar in a medium-sized mixing bowl. Add the egg yolks and whisk until well combined. Pour the milk and the remaining 1/4-cup sugar into a 2-quart saucepan and place the saucepan over medium-high heat. While the milk is heating, use a sharp knife to slice the vanilla bean in half lengthwise. Separate the seeds from the outside skin by scraping the blade of the knife along the inside of the bean. Add the seeds and the skin to the heating milk and bring to a boil.
- Temper the egg mixture with the hot milk by carefully pouring about half of the milk into the egg mixture. Immediately whisk to prevent the eggs from scrambling. Pour the tempered egg mixture into the saucepan and continue to whisk. Continuously whisk to ensure that the mixture cooks evenly. Once the pastry cream has come to a boil, continue to whisk and cook for another 2 minutes to fully develop the flavor of the pastry cream and to cook out the flavor of the starch. Remove the pan from the heat. Strain the pastry cream through a fine-mesh sieve to remove any pieces of cooked egg and the vanilla bean.
- If you would like to add butter, this is the time to add it. Cut the butter into small chunks and stir it in until it is well incorporated. Pour the pastry cream into a clean, airtight container and place a piece of plastic wrap directly on top of the pastry cream to prevent a skin from forming. Let cool at room temperature, then store in the refrigerator for up to 2 to 3 days, until ready to use
- Flavor the cream according to your taste. For example, with a whisk or spatula, slowly fold about 1 tablespoon of any flavored liqueur into the cream at any point in the recipe, tasting often. If you add too much, the cream will become runny and lose its shape. If you prefer to add flavor without alcohol, place the zest of 1 orange in the heating milk to infuse the flavor into the pastry cream. Store the pastry cream well wrapped in the refrigerator until ready to use.
- Place the sugar, corn syrup, and water in a 2-quart heavy-bottomed saucepan over medium-high heat. Insert a candy thermometer and cook the sugar mixture until it reaches 311 degrees F, or what is known as the hard crack stage. Remove from the heat and carefully pour into a medium-sized, microwave-able glass bowl.
- Wash, dry, and lightly but thoroughly coat with cooking spray a clean, dry bowl that matches the diameter of whatever you're placing the sugar cage over. Dip the tines of a fork into the hot sugar. Carefully but quickly wave the fork over the inside of the bowl, allowing the sugar to drip off the fork in long, thin strands. Try to distribute the strands evenly on the sides and bottom of the bowl, making sure to come all the way to the rim, however, not so thick that you can't see the bowl through the sugar.
- Using a sharp chef's knife, slice the edge of the cage clean by scraping the blade of the knife along the rim of the bowl. Set aside to cool, about 5 minutes.
- To unmold the cage, place your thumbs on the outside of the bowl and your fingers on the inside of the sugar cage. Gently pull the cage loose from the side and bottom of the bowl; you will be able to see the cage release from the inside of the bowl. You will need to apply this gentle pressure all around the inside of the bowl. Once the cage has released from the bowl, carefully lift it out and place it over the dessert. If the sugar is still too warm, the cage may begin to collapse. A good idea is to release the cage from the bowl but leave it in the bowl until it has cooled completely. This will ensure that it keeps its shape. (At this stage, the cage can be stored, right side up, in an airtight container in a cool, dry place for one to two days.)
- How to Temper Chocolate(From Dessert Circus, Extraordinary Desserts You Can Make At Home by Jacques Torres):
- Chocolate is tempered so that after it has been melted, it retains its gloss and hardens again without becoming chalky and white (that happens when the molecules of fat separate and form on top of the chocolate). There are a variety of ways to temper.
- One of the easiest ways to temper chocolate is to chop it into small pieces and then place it in the microwave for 30 seconds at a time on high power until most of the chocolate is melted. Be very careful not to overheat it. (The temperature of dark chocolate should be between 88 and 90 degrees F, slightly warmer than your bottom lip. It will retain its shape even when mostly melted. White and milk chocolates melt at a temperature approximately 2 degrees F less because of the amount of lactose they contain.) Any remaining lumps will melt in the chocolate's residual heat. Use an immersion blender or whisk to break up the lumps. Usually, chocolate begins to set, or crystallize, along the side of the bowl. As it sets, mix those crystals into the melted chocolate to temper it. A glass bowl retains heat well and keeps the chocolate tempered longer.
- Another way to temper chocolate is called seeding. In this method, add small pieces of unmelted chocolate to melted chocolate. The amount of unmelted chocolate to be added depends on the temperature of the melted chocolate, but is usually 1/4 of the total amount. It is easiest to use an immersion blender for this, or a whisk.
- The classic way to temper chocolate is called tabliering. Two thirds of the melted chocolate is poured onto a marble or another cold work surface. The chocolate is spread out and worked with a spatula until its temperature is approximately 81 degrees F. At this stage, it is thick and begins to set. This tempered chocolate is then added to the remaining non-tempered chocolate and mixed thoroughly until the mass has a completely uniform temperature. If the temperature is still too high, part of the chocolate is worked further on the cold surface until the correct temperature is reached. This is a lot of work, requires a lot of room, and makes a big mess.
- A simple method of checking tempering, is to apply a small quantity of chocolate to a piece of paper or to the point of a knife. If the chocolate has been correctly tempered, it will harden evenly and show a good gloss within a few minutes.
Nutrition Facts
| Amount Per 1 Serving | |||
| Calories | 794.05 Kcal (3325 kJ) | ||
| Calories from fat | 285.72 Kcal | ||
| % Daily Value* | |||
| Total Fat | 31.75g | 49% | |
|---|---|---|---|
| Cholesterol | 110.85mg | 37% | |
| Sodium | 423.35mg | 18% | |
| Potassium | 113.51mg | 2% | |
| Total Carbs | 124.93g | 42% | |
| Sugars | 83.42g | 334% | |
| Dietary Fiber | 1.85g | 7% | |
| Protein | 7.74g | 15% | |
| Vitamin A | 0.3mg | 12% | |
| Iron | 2.8mg | 16% | |
| Calcium | 72.5mg | 7% | |
| Amount Per 100 g | |||
| Calories | 317.65 Kcal (1330 kJ) | ||
| Calories from fat | 114.3 Kcal | ||
| % Daily Value* | |||
| Total Fat | 12.7g | 49% | |
|---|---|---|---|
| Cholesterol | 44.35mg | 37% | |
| Sodium | 169.36mg | 18% | |
| Potassium | 45.41mg | 2% | |
| Total Carbs | 49.98g | 42% | |
| Sugars | 33.37g | 334% | |
| Dietary Fiber | 0.74g | 7% | |
| Protein | 3.1g | 15% | |
| Vitamin A | 0.1mg | 12% | |
| Iron | 1.1mg | 16% | |
| Calcium | 29mg | 7% | |
* Percent Daily Values are based on a 2000 calorie diet. Your daily values may be higher or lower depending on your calorie needs.
Find out how many calories should you eat.
Try this similar recipes
-
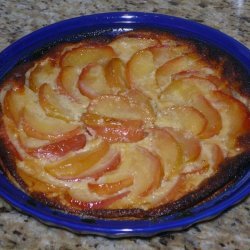
Apple Clafouti
Unbleached all-purpose flour, Sugar , plus, Sugar and 13 more.. -
Creme de Pirouline
Sugar, All-purpose flour, Salt, Unsalted butter, melted and 6 more.. -

Vanilla Bean Cupcakes
Unsalted butter, softened, Sugar, Eggs, Whole milk and 10 more.. -
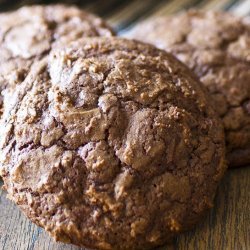
Chocolate Crackle Cookies
Bittersweet chocolate, coarsely chopped, All-purpose flour and 9 more.. -
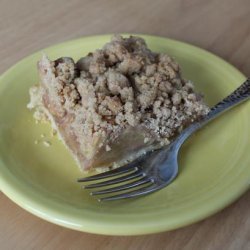
Dutch Apple Pie Bars
Unbleached all-purpose flour, Salt, Unsalted butter and 17 more.. -

Easter Bread
Milk, Sugar, divided and 8 more.. -
Onion, Cheese & Bacon Tart
Unbleached all-purpose flour, Salt and 13 more.. -
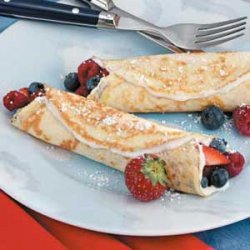
Fruit 'n' Cream Crepes
Milk, Beaten egg, Vanilla extract and 11 more.. -
Cinnamon Butter Cookies
Butter, White sugar, Egg, Vanilla extract and 8 more.. -
Spinach Lasagna Bechamel
Milk, Butter, Unbleached flour, Salt and pepper and 11 more.. -
Sweet Onion Tart
Unbleached white flour, Salt, Cold butter, Ice water and 11 more..
Also Try
-


Crispy Crusts With Sauted Fruits
Flour, A pinch of salt, Egg, beaten, Water as required and 9 more.. -
-
-

Leek Tart With Fresh Herbes De Provence
Leeks, thinly sliced (1 1/2 cups), Garlic, minced and 14 more.. -
-
-

Omelet With Fresh Fruit Compote
Blood orange, peeled , pith removed and sectioned (sectio... and 12 more.. -
-
Buttermilk Pudding With Fresh Fruit
Gelatin powder (if you buy knox gelatine, each 1 of the 4... and 5 more.. -
Whole Wheat Pancakes With Fresh Fruit
Whole wheat flour, Baking powder, Toasted sliced almonds and 10 more..
Get Your Recipe of Health!
Follow RecipeOfHealth on Facebook!
