
Ingredients:
- freshly-ground pepper , to taste
- seasoning salt , to taste (optional)
- sage , to taste (optional)
Directions:
- THREE DAYS BEFORE SERVING (Monday before Thanksgiving), prepare 2 recipes of *scratch* cornbread; allow to sit on the counter, loosely covered, overnight. (To emphasize again, do NOT use a cornbread mix since they all contain sugar, which will ruin this dish!) If you've made it in advance and frozen it, remove from freezer and allow to thaw overnight.
- Prepare two batches of homemade chicken broth; strain and refrigerate overnight. (If made in advance and frozen, move from freezer compartment to fridge to thaw.).
- Wrap 12 slices of sandwich bread loosely in paper towels and allow to sit on counter overnight. (You want the bread to be a little 'crusty' instead of squishy-soft. Exposing it to air overnight will give it that 'day-old' texture. If you forgot to buy the bread, don't panic. You can pick up a fresh loaf tomorrow and toast it lightly, achieving a similar end result. If using white bread, be sure it's regular rather than 'thin-sliced', as volume is important. If using wheat - which I actually prefer, btw, even though it's a little heretical - buy a very plain type rather than one with lots of seed thingies.).
- TWO DAYS BEFORE SERVING (Tues.), clean and chop vegetables. (The best advice I can offer you is to spend $19.95 on an 'alligator'. A very labor-intensive task can be finished in a matter of minutes.).
- Melt 1 stick (8 Tablespoons) of butter or margarine in a large, heavy skillet over medium-low heat; add celery, onion, green onion and bell pepper. Cook until very soft, stirring occasionally. (You don't want to let the veggies start to brown. On the other hand, this should not be just a quick saute. Let them cook about 15 minutes. It will smell great!).
- Crumble cornbread. (You definitely want 'crumbs' rather than 'chunks' - but they should be very coarse crumbs rather than fine. I do it in 4 batches, tearing 1/2 of a cornbread round into pieces, putting it into the food processor and then pulsing off and on several times. If you don't have a processor, you can do it by hand.).
- Crumble sandwich bread. (Call me a glutton for punishment, but I don't put it in the f/p. The crumbs get way too fine. I tear it by hand into pieces approximately the size of a raisin. May be my imagination, but it seems to make a difference in a dish that's all about texture. And, no, you don't remove the crusts.).
- In a huge pan, combine bread and cornbread crumbs, stirring well to mix. (I use the top of a large old turkey roaster, turned upside down. If you don't have anything humongous, you may need to divide ingredients to fit into two containers.).
- Add sauteed vegetables and chopped Italian parsley to bread, stirring well.
- Heat about half the broth. (Doesn't need to be boiling hot - just fairly warm so it will combine well. If there is a solid white layer on top, there's nothing wrong with it. That's simply fat that has risen to the surface and congealed. Scoop off as much as you can and discard. The rest will liquify and disappear when you heat it.).
- Add 4 to 6 cups broth to vegetable/bread mixture to thoroughly moisten. (At some point, it will sort of come together and suddenly be very 'stirrable'. Not to fret if it only takes 3 cups of broth or takes as many as 7. It's all about consistency, not exact quantities.).
- Once the mixture is cohesive, continue adding small amounts of broth (about 1/2 cup at a time), stirring well after each addition, until it reaches the proper consistency. (At first, the bread will soak up all the liquid immediately. Once it's no longer absorbing it all - after you stir it well, a little 'puddle' of liquid immediately reappears on top - then you'll know you've added enough.).
- Season to taste with salt, seasoned salt and pepper. (So many variables! Much depends on whether you used Chef Kate's salt-free method for making broth or another version, whether you used salted or unsalted butter to saute the veggies, whether or not you plan to ignore my specific instructions to use kosher instead of 'table' salt, etc. I used far less salt last year than ever before. Finally figured out that I'd let the stock simmer an extra hour or so, and it was so rich and flavorful that more seasonings just weren't required. But assuming you've minded me so far, I'd suggest you start with 1 teaspoon each of the salts and go from there in *very* small increments. I add a ton of pepper, but that's a matter of personal taste. Just add slowly, stir a lot, and taste frequently! Remember that you have a couple of days to let the flavors develop.).
- Place the roasting pan on the stovetop turned front-to-back instead of sideways, so that it covers two eyes; turn both burners on medium and heat mixture thoroughly, stirring frequently. (As it heats, the part on the bottom will start to brown, which is a good thing. Adds lots of flavor. But if it gets too brown and begins to scorch, that is a terrible thing! So you don't want to just scoot your spoon around in the middle. You have to really dig down to that bottom layer, scraping it off as it hardens and mixing it back in, allowing more of the dressing to sink down and begin to brown.) At this stage, I cook it approximately an hour, scraping the bottom of the pan every 5 minutes or so. Achieving the right texture is critically important, and the best comparison I can think of is to oatmeal. You want it to look like oatmeal does shortly before it's done - very little excess liquid left, but still easily stirrable and not quite to the final 'thickening' stage. If it becomes too dry as it cooks, stir in another cup of broth. If you accidentally got it too soupy initially, that can be easily corrected simply by letting it cook a little longer to absorb the excess.
- Allow mixture to cool; cover and refrigerate.
- ONE DAY BEFORE SERVING (Wed.), reheat dressing, stirring frequently; add additional broth if necessary. (It definitely tends to thicken up when chilled. If it's really stiff, stir in some broth before reheating so it won't burn. If the mixture is very 'loose' and easily stirred, you've got a little too much in there already, so don't add more. And even if it seems just right at this point, don't fail to stir well and often.).
- Once the dressing is hot, taste and adjust seasonings. (After it's sat overnight, you should be able to get a much better idea of how much more salt and pepper is needed. Again, just go slowly!). Continue to cook and stir for about 30 minutes.
- Cool mixture, cover and refrigerate.
- THANKSGIVING DAY, hard boil 4 of the eggs; peel, chop and stir into dressing. (Okay, I realize that might sound weird if you've never had it before. But, trust me, it's wonderful! Leave 'em out and you miss one of the best parts. You don't want to add them until the last day, though, because repeated heating tends to make them sort of rubbery.).
- Reheat dressing, adding more warm broth if necessary. (Unless you've really gone overboard to begin with, it's almost always necessary to add a little more broth each day after it's been chilled. Also keep in mind that you are about to add raw eggs, which will thicken it considerably. So the mixture should definitely be thinner than you want it to end up. There should be no liquid separating or 'pooling', but it should all be very easily stirred.).
- Make a final check for seasonings, adding sage if you must. (We despise it, but my mother always added a tiny pinch. And I do mean 'tiny'! I once asked her what possible effect it could have on such a large quantity of food. None, I hope - but you're 'supposed to'. I'm not sure if that meant she was the ultra-traditionalist or just a tiny bit superstitious. lol But, at any rate, this totally un-PC, sage-hating cook always adds a pinch in her memory. Even if you like it, it's best to add it pretty sparingly.).
- Shortly before baking, beat the remaining 4 eggs well and stir into dressing. (Don't do it earlier because there's a safety issue.).
- Bake at 350 degrees for 1-1/2 to 2 hours. (Okay, it's only supposed to take an hour, BUT - you know how often an oven door may get opened while the preparation of the feast is in progress. Way more than normal! Plus, it's wonderful when the top is brown and a tiny bit crispy. You might even want to crank the heat up at the last minute if it hasn't browned sufficiently. And given the fact that it's a huge quantity, allowing a little extra time for it to get really hot in the middle is a good idea. So it's better to count on longer instead of shorter. If you're really worried about it, take it out at the one-hour mark and taste it. If it's dry, add some more heated broth and stir in well. If it's 'soupy', extend the cook time.).
Nutrition Facts
| Amount Per 1 Serving | |||
| Calories | 1176.52 Kcal (4926 kJ) | ||
| Calories from fat | 59.54 Kcal | ||
| % Daily Value* | |||
| Total Fat | 6.62g | 10% | |
|---|---|---|---|
| Cholesterol | 86.61mg | 29% | |
| Sodium | 470.07mg | 20% | |
| Potassium | 229.24mg | 5% | |
| Total Carbs | 4.89g | 2% | |
| Sugars | 2.23g | 9% | |
| Dietary Fiber | 1.21g | 5% | |
| Protein | 3.25g | 6% | |
| Vitamin C | 19.6mg | 33% | |
| Vitamin A | 0.2mg | 7% | |
| Iron | 3mg | 17% | |
| Calcium | 36.5mg | 4% | |
| Amount Per 100 g | |||
| Calories | 278.28 Kcal (1165 kJ) | ||
| Calories from fat | 14.08 Kcal | ||
| % Daily Value* | |||
| Total Fat | 1.56g | 10% | |
|---|---|---|---|
| Cholesterol | 20.49mg | 29% | |
| Sodium | 111.18mg | 20% | |
| Potassium | 54.22mg | 5% | |
| Total Carbs | 1.16g | 2% | |
| Sugars | 0.53g | 9% | |
| Dietary Fiber | 0.29g | 5% | |
| Protein | 0.77g | 6% | |
| Vitamin C | 4.6mg | 33% | |
| Iron | 0.7mg | 17% | |
| Calcium | 8.6mg | 4% | |
* Percent Daily Values are based on a 2000 calorie diet. Your daily values may be higher or lower depending on your calorie needs.
Find out how many calories should you eat.
Try this similar recipes
-
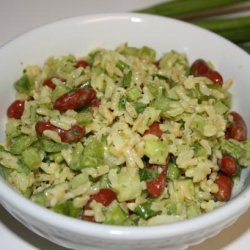
Curried Rice and Bean Salad
Cooked brown rice, Cooked red kidney beans and 8 more.. -
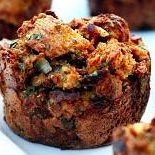
Thanksgiving Stuffing Muffins
Onion, finely chopped, Chopped celery and 11 more.. -
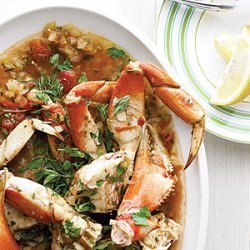
Quick Crab Stew in Fennel-Tomato Broth
Celery stalks, trimmed and cut in half and 13 more.. -

Easy Chicken and Dumplings
Chicken broth, Cream of chicken soup, Carrots, diced and 9 more.. -
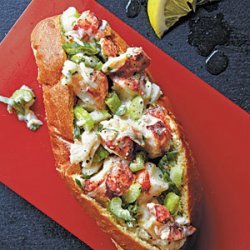
Picnic-Perfect Lobster Rolls
Chopped celery, Grated lemon rind, Chopped green onions and 9 more.. -

Lower Fat Chicken Vegetable Soup
Chicken broth, Shredded cabbage, Chopped carrot and 11 more.. -
Swiss Chard Spanakopita Casserole
Minced white onion, Minced green onions and 10 more.. -
Chicken Vegetable Casserole
Butter, softened, Sour cream, Egg and 9 more.. -

Tortilla-Crusted Cod Cakes
Red onion, Fresh cilantro, Olive oil and 7 more.. -
Seaview Crab Imperial
Green bell peppers, finely diced (1/4 cup) and 10 more.. -

Garden Tomato Soup
Chopped celery, Onion, chopped, Carrot, shredded and 9 more.. -
Broccoli Casserole
Butter, Onion, chopped, Chopped frozen broccoli, thawed and 10 more.. -
Rainbow Soup
Celery, Red onion, divided, Red pepper and 8 more..
Also Try


Get Your Recipe of Health!
Follow RecipeOfHealth on Facebook!
