
Directions:
- Start the yeast: Warm 1/4 cup water to 100 F, dissolve 1/2 tsp sugar, stir in Tbl active yeast to suspend. Set a side for 10-15 minutes. It should foam up in that time. If not, get some good yeast.
- Warm 6 cups of water to 100 F, add to bowl, whisk in the molasses and the salt. Add the foamy yeast, whisk in.
- Whisk in flour, 2 cups at a time until it is too stiff to easily mix with the whisk. Clean dough off of whisk. Add another cup or two of flour on top of dough, work down along the sides with your fingers so the dough does not stick. Continue adding flour until dough begins to come together. (Gets slightly firmish...)
- Sprinkle a cup or two of flour on a clean kneading surface (porcelain counters work great), and turn out dough onto the flour. Loosen stuck spots in the bowl by rubbing with flour. Sprinkle flour on top of dough, and lightly bring in edges with your fingertips, folding over on top. Every time you see a wet spot, hit it with a little flour, keep folding over and turning on itself. Continue until there are no more major wet spots.
- Knead the dough until it is smooth and elastic: Fold the dough in half, press down and roll with the heel of your hand, turn the dough a quart of a turn. Repeat these steps over and over, adding small amounts of flour to prevent sticking either to the board or to your hands. Do not add so much flour that the dough gets tough or hard.
- Notice that the actual amount of flour added depends on the nature, grind, amoung of glutin, etc. of your flour. This is the art of bread making: you kneed in flour until it is the correct consistency.
- Brush the 2 gallon pot with a small amount of oil to prevent the dough from sticking, and turn the dough in to the pot. Turn the dough over several times to coat all sides with oil. Cover the pot, let sit in warm place until double in size, about an hour or so, depending on how warm the spot is. Do not let it get above 105 F (40 C).
- Punch the dough down, knead briefly to bring back together, and weigh out two pieces of 1 3/4 lbs each.
- Knead each of the four loaves until they are smooth and elastic. Let rest for a few minutes, then shape each into a loaf as follows:
- SHAPE THE LOAVES:
- Press out into a rectangle about 6 x 8 inches. Roll snuggly along the long dimension, and pinch the end edge against the body of the loaf. Turn the seam so it is on the bottom, and press each end with the side of the hand about 1/2 inch from the end and turn each flap under the loaf. (We need pictures here...)
- Ently transfer the loaf to a lightly oiled bread pan so that all seams are on the bottom, and it is centered in the pan. Repeat for the other three loaves.
- Place on a carrying rack.
- Wet a clean, white non-terrycloth dish towel, and wring out as much water as you can. Cover the four loaves with the damp towel, and place the rack in a warm place until doubled in size. Do not let the loaves over-rise, or they will fall, and you will have flat top bread... This is especially a problem with coarsely ground flour.
- Pre heat the oven to 360 F before the loaves have doubled in size. With the oven preheated and the loaves doubled in size, place the loaves on a rack in the middle of the oven (top rack and bottoms racks often burn edges). Ensure equal circulation of hot air around all sides of each pan.
- Check after 20 minutes to be sure they are evenly baking. Rotate loaves if you see some more done than others.
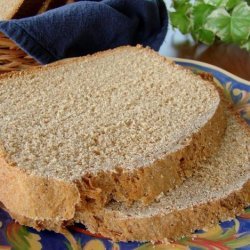
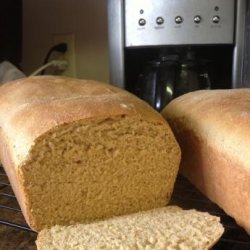
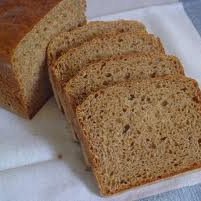
- After 30-35 minutes, remove the most done looking loaf with hot pads/mitts. Remove it from the pan. Sometimes it takes a sharp rap of the corner of the pan on a hard surface to free it. Thump the bottom of the loaf with a sharp rap of the finger. If it sounds hollow, it is done. If it sounds muffled or sodden, bake it 5 minutes more and test it again. As loaves sound hollow, remove from the oven, and place on a cooling rack which allows air circulation so the steam can escape.
- This is a good time to taste the heel with a slab of cold butter...
- When the loaves have thoroughly cooled, place the in a large plastic bag, close to seal, and store in the refrigerator.
Nutrition Facts
| Amount Per 1 Serving | |||
| Calories | 82.96 Kcal (347 kJ) | ||
| Calories from fat | 2.16 Kcal | ||
| % Daily Value* | |||
| Total Fat | 0.24g | 0% | |
|---|---|---|---|
| Sodium | 4.1mg | 0% | |
| Potassium | 30.21mg | 1% | |
| Total Carbs | 17.86g | 6% | |
| Sugars | 0.25g | 1% | |
| Dietary Fiber | 0.5g | 2% | |
| Protein | 1.87g | 4% | |
| Iron | 1.6mg | 9% | |
| Calcium | 5.9mg | 1% | |
| Amount Per 100 g | |||
| Calories | 191.26 Kcal (801 kJ) | ||
| Calories from fat | 4.97 Kcal | ||
| % Daily Value* | |||
| Total Fat | 0.55g | 0% | |
|---|---|---|---|
| Sodium | 9.46mg | 0% | |
| Potassium | 69.66mg | 1% | |
| Total Carbs | 41.18g | 6% | |
| Sugars | 0.59g | 1% | |
| Dietary Fiber | 1.15g | 2% | |
| Protein | 4.32g | 4% | |
| Iron | 3.7mg | 9% | |
| Calcium | 13.6mg | 1% | |
* Percent Daily Values are based on a 2000 calorie diet. Your daily values may be higher or lower depending on your calorie needs.
Find out how many calories should you eat.
Try this similar recipes
-

Pizza Dough II
Active dry yeast, White sugar, Warm water (110 degrees f) and 4 more.. -
Taste of Home Homemade Pizza Crust
Active dry yeast, Sugar, Warm water, Olive oil, Salt and 7 more.. -
Tuscan Rolls
Fast-rising active dry yeast (approximately 1 tbsp), Sugar and 5 more.. -
Kittencal's Cheddar Loaves or Buns
Dry yeast, Dry yeast, Sugar, Warm water, Full-fat milk and 7 more.. -
Chelsea Buns
Active dry yeast, White sugar, Warm water and 10 more.. -
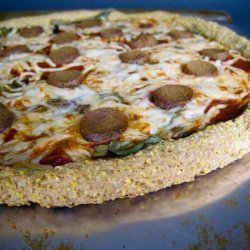
Cornmeal Pizza Crust
Dry yeast, Sugar, Warm water, Flour (more if needed), Salt and 4 more.. -

Chili Pizza
Dry yeast, Sugar, Warm water, Flour (more if needed), Salt and 10 more.. -
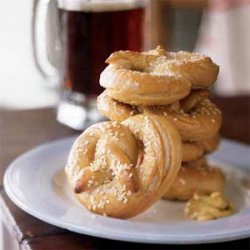
Soft Pretzels
Dry yeast (about 2 1/4 tsp), Sugar and 10 more.. -

Indian Tacos with Yeast Fry Bread
Active dry yeast, White sugar, Warm water and 17 more.. -

Skillet Pizza Crust
Active dry yeast, Sugar, Warm water (105 115) and 6 more.. -

Cinnamon Crescents
Active dry yeast, Sugar, Warm water (105-115 degrees f) and 12 more.. -
Coffee Can Bread
Dry yeast, Sugar, Warm water, Evaporated milk, Salt, Sugar and 2 more..
Also Try


Get Your Recipe of Health!
Follow RecipeOfHealth on Facebook!
