
Ingredients:
- remember-you are working with yeast....and it's alive-so don'tsp kill it before it has a chance to do it's job. use baby bottle warm water-not hot. make the sponge starter at least 2 (or as many as 16) hours before you plan to make the bread.
- for the sponge starter-stir together in a bowl: 1 cup warm water, 1/2 teaspoon active dry yeast, 1 cup bread flour, 1/4 cup rye flour, 1/4 cup whole wheat flour.
- stir the above ingredients together to make a thickish pudding-like mixture. cover loosely with plastic wrap and let it sit on your kitchen counter for at least 2 hours (or as many as 16-the longer you let it sit-the more flavor will be enhanced).
- for the dough you'll need
Directions:
- To make the dough: (no need for a mixer-it can all be done with a wooden spoon). This recipe makes 2 medium sized or 1 large loaf.
- Once your starter has developed for a few hours, it should have risen a little, look like it's a little bubbly & depending on how long you let it sit-it may even smell a little tiny bit sour-thats's desirable.
- Take the WARM water and stir it into your starter-really mix the water in well-you can use a wooden spoon or a dough whisk.
- Add the sugar, salt and yeast and stir that in well.
- Start with 1 cup of bread flour and stir that in, mixing it well so that you see no dry clumps of flour.
- Now, stir in a 2nd cup of bread flour, mixing well so you see no dry clumps. Time is your friend when making bread AND...the flour needs a chance to absorb the water......if you let dough rest a few minutes, it can absorb the water and come together better for you.
- OK, it's time to stir in the 3rd cup of bread flour and mix it well so that you see no dry clumps of flour. If dough is a little unruly, just let it rest 5 or 10 minutes so flour can absorb the water, then start stirring again. Keep stirring/resting until dough comes together into a smooth, cohesive mass of dough.
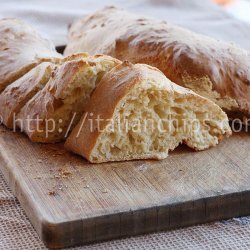
- Here is the (slightly) tricky part: depending on the weather, the humidity, the brand of flour you use, kitchen magick etc etc-you may not need the rest of the flour (1/2 to 1 cup). When I made this bread, I only needed 1/4 of a cup (besides the 3 I already added)-you may need more. Don't be scared! The goal here is to get the flour mixed in well, with no dry patches and have the dough be smooth looking and sticking to your wooden spoon (or whisk). If you feel you need to add more flour, do so a TABLESPOON at a time. By repeating intervals of stirring dough, then letting it rest-you'll use less flour and get some of that holey crumb we all seek.
- Once the dough is well mixed, cover it loosely with plastic wrap and let it rise for 1-2 hours (possibly more) until it's doubled in size.
- Time to get the pan ready: I bake on parchment covered cookie sheet, so I got that ready. If you are using a cookie sheet (without parchment)-put two of them together (to protect bottom crust) and dust the top cookie sheet with cornmeal.
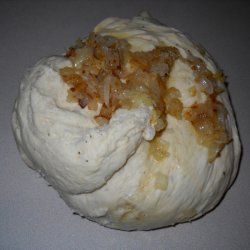
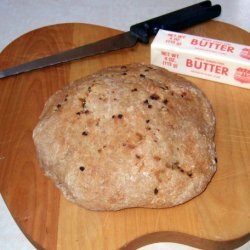
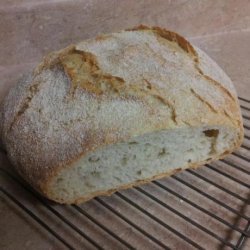
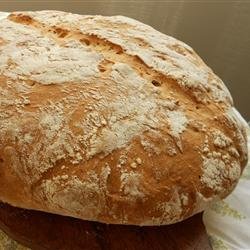
- OK, now you can either shape it and get it ready to bake OR you can gently deflate it and let it rise a 2nd time until doubled in size. For shaping: I oiled my hands really well, and using a serrated knife, I gently cut the dough in half and with very oiled hands, I quickly shaped by dough into a boule (round) loaf and plopped it on my parchment covered sheet.
- I re-oiled my hands and quickly shaped the other half of dough**(see 16-19 below) and plopped it on my parchment. I spritzed a sheet of plastic wrap with a pam type spray and loosely covered my loaves to rise again for about 45-90 minutes. After about 30 of those minutes, I put an oven rack in center of oven, and I put a rack on a lower shelf also. I set the oven for 475°, and I put my broiler pan on the lower rack and I half filled it with hot water.
- OK, dough has to finish rising and oven needs to heat up-time to spritz your loaves with water, then slash them with a serrated knife. Hang on to that water bottle because you'll use it again.
- Once oven is up to temp, put the bread(s) in on the centered rack, quickly spritz again with water (watch the glass on your oven door and watch oven lightbulb!)-shut oven door and decrease oven temp to 425° (that initial blast of heat helps maximize oven spring).
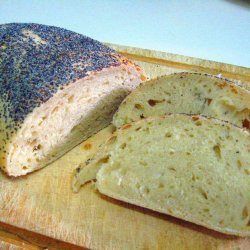
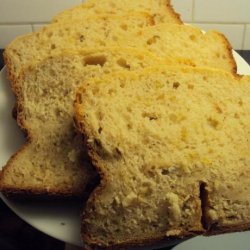
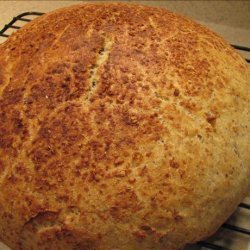
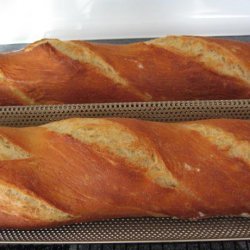
- Bake your loaves for 15 minutes, then rotate pan to facilitate even browning and bake for another 10-15 minutes. Loaves will be golden brown and evenly colored. I made 2 loaves at once, and bake time was exactly 30 minutes.
- OK, so what do you do if you don't want to make 2 loaves at once?
- Take the other half and cover it loosely with lid or plastic wrap, and chill it in fridge. You can wait a day or so and when you are ready to bake that 2nd half:
- Remove it from fridge (it will have risen somewhat)-leave it out on countertop for at least 2 hours so it can come to room temp.
- Oil your hands, gently shape it and place it on your prepared pan and follow from step 12 above.
Nutrition Facts
| Amount Per 1 Serving | |||
| Calories | 90.61 Kcal (379 kJ) | ||
| Calories from fat | 4.21 Kcal | ||
| % Daily Value* | |||
| Total Fat | 0.47g | 1% | |
|---|---|---|---|
| Sodium | 52.68mg | 2% | |
| Potassium | 33.83mg | 1% | |
| Total Carbs | 18.49g | 6% | |
| Sugars | 0.33g | 1% | |
| Dietary Fiber | 0.7g | 3% | |
| Protein | 3.02g | 6% | |
| Iron | 1mg | 6% | |
| Calcium | 4.3mg | 0% | |
| Amount Per 100 g | |||
| Calories | 269.48 Kcal (1128 kJ) | ||
| Calories from fat | 12.52 Kcal | ||
| % Daily Value* | |||
| Total Fat | 1.39g | 1% | |
|---|---|---|---|
| Sodium | 156.66mg | 2% | |
| Potassium | 100.6mg | 1% | |
| Total Carbs | 54.99g | 6% | |
| Sugars | 0.98g | 1% | |
| Dietary Fiber | 2.08g | 3% | |
| Protein | 8.99g | 6% | |
| Iron | 3mg | 6% | |
| Calcium | 12.7mg | 0% | |
* Percent Daily Values are based on a 2000 calorie diet. Your daily values may be higher or lower depending on your calorie needs.
Find out how many calories should you eat.
Try this similar recipes
-
Egg Bread Magic
Milk, Eggs, Sugar, Salt, Butter (or margarine) and 2 more.. -
Apple Butter Bread for Bread Machine
Water, Vegetable oil, Apple butter, Sugar, Salt and 3 more.. -
Portuguese Sweet Bread
Evaporated milk, Unsalted butter , cut into pieces, Eggs and 7 more.. -
Chewy Banana Oatmeal Bread (A*b*m)
Water, Mashed banana, Oil or 2 1/2 tbsp plain yogurt and 6 more.. -
Chicken Garlic Pizza
Warm water, Warm water, Oil, Sugar, Salt and 14 more.. -
Banana Oatmeal Bread
Water, Mashed bananas, Vegetable oil, Sugar, Salt, Oats and 2 more.. -
Peanut Butter and Jelly Loaf
Water, Oil, Peanut butter, Jelly, Sugar, Salt and 3 more.. -
Sourdough Oatmeal Bread
Sourdough starter, Butter, Sugar, Salt, Oats, Bread flour and 2 more.. -
Potato Leek Bread (Abm)
Milk, Butter, Eggs, Mashed potatoes, Sugar, Salt and 4 more.. -
Onion Bread
Water, Butter, Onion, grated, Sugar, Salt and 3 more..
Also Try
-

-
No Knead Whole Grain Artisanal Breads
Whole wheat flour, All purpsoe flour, Granulated dry yeast and 7 more.. -
-
Crusty Country Style French Bread
Water (warm 110 f or 43 cup), Sugar, Active dry yeast and 3 more.. -
-
-
-
-
-
Bread Everyday! No Knead Boule
Lukewarm water (just above body temp.), Granulated yeast and 4 more..
Get Your Recipe of Health!
Follow RecipeOfHealth on Facebook!
