
Directions:
- Day 1, Morning: Take 1/2 a pound of the Meyer lemons and cut them into eighths. Place these in a non-reactive saucepan where they will fit snugly in a single layer. Add enough cold water for the fruit to bob freely. Cover tightly and let rest for 8 hours at room temperature.
- Day 1, Afternoon: After 8 hours have passed, bring the pan with the Meyer lemon eighths and water to a boil over high heat, then decrease the heat to medium-low. Cook the fruit at a lively simmer, covered, for 2 hours - the lemons will become very soft and the liquid will become slightly syrupy. As the lemons cook, press down on them gently with a spoon every 30 minutes or so, adding a little more water if necessary. The water level should remain consistently high enough for the fruit to remain submerged as it cooks.
- When the lemons are finished cooking, strain their juice by pouring the hot fruit and liquid into a fine mesh strainer or jelly bag set over a medium bowl. Cover the whole setup with plastic wrap and let drip overnight at room temperature.
- Meanwhile, prepare the Meyer lemon slices and the navel oranges.
- To prepare the Meyer lemon slices: take the remaining half pound of the Meyer lemons. Halve them lengthwise, then cut each half into thirds (each lemon will be cut into 6 pieces at this point). Take each lemon slice and pry out any seeds from it. You can place these seeds in the pot with the lemon eighths and water which is currently simmering - this will add more pectin.
- Slice each Meyer lemon slice thinly crosswise - how thick you slice is a personal preference. I prefer to slice very thinly, making each slice 1/8th of an inch or less. But if you like you could make your slices thicker. I wouldn't recommend going much thicker than 1/4 of an inch.
- Place these Meyer lemon slices (they will look like a lot of little triangles) in a stainless steel pot and cover with water, covering the slices by 1 inch. Bring to a boil over high heat, then decrease the heat to medium and simmer for 5 minutes. Drain, discarding the liquid. Return the lemon slices to the pot and cover with 1 inch of cold water. Bring to a boil over high heat, decrease the heat to medium-low, and cook at a lively simmer, covered, for 20 minutes. As the fruit cooks, stir it gently every 10 minutes or so, adding a little more water if necessary. The water level should stay consistently high enough for the fruit to remain submerged as it cooks. After 20 minutes, remove the pan from the heat, cover tightly, and let rest overnight at room temperature.
- To prepare the navel oranges: Cut the oranges in half, squeeze the juice out of the halves into a bowl, and strain the juice. Place this fresh orange juice in a covered container and store in the refrigerator.
- Put the juiced orange halves in a large non-reactive kettle or stock pot and cover them with water by 1 inch. Bring to a boil over high heat, then decrease the heat to medium-low and cook at a lively simmer for 5 minutes. Drain, discarding the liquid. Return the orange halves to the kettle and add water to cover them by 1 inch. Bring to a boil over high heat, then decrease the heat to medium-low and cook, covered, at a lively simmer for 1 hour. As the oranges cook, press down on them gently with a spoon every 15 minutes, adding more water if necessary. The water level should stay consistently high enough for the fruit to remain submerged as it cooks. After 1 hour, remove the pan from the heat, cover tightly, and let rest overnight at room temperature.
- Day 2, Morning: Remove the plastic wrap from the lemon eighths and their juice and discard the lemons remaining in the strainer or jelly bag. Do not squeeze the bag or press down on the lemons if you want a clear jelly in your marmalade. Set this juice aside.
- Prepare the oranges: Remove the orange halves from their cooking liquid, RESERVING THE LIQUID. Over a large bowl, use a spoon to gently scoop the remaining flesh and membranes from the orange halves, going around each one two or three times until its interior is smooth and its rind is a uniform thickness. Place the flesh and membranes, along with the reserved cooking liquid, in a fine mesh strainer and let this drip while you slice the orange rinds.
- Slice each orange rind into 5 equal strips, and then cut each strip crosswise into slices; again, I like to make my slices about 1/8th of an inch thick, but you could make yours thicker if you like. Set the orange rind slices aside.
- Empty the fine mesh strainer, discarding the orange flesh/membrane mixture, and set the strainer back up over the bowl containing the juice you just strained from the oranges. Pour the Meyer lemon slices and their juice through the strainer, and let this mixture drip for about 15 minutes. Remove the Meyer lemon slices from the strainer - DO NOT DISCARD - set them aside. Mix the combined cooked juices you have strained from the oranges and lemon slices, mixing well, and set aside.
- Mix together the reserved cooked juice from the Meyer lemon eighths and the fresh orange juice. Add to this enough of the combined cooked juices from the Meyer lemon slices and the orange rinds to make 6 cups total. You will have a lot of the combined cooked juices from the Meyer lemon slices and orange halves left over after you use what you need to make up the 6 cups. You can just discard the leftover amount.
- In a large preserving pan, combine the 6 cups of mixed juices, the Meyer lemon slices, and the navel orange rind slices. If you do not have a preserving pan, use the widest pan you have. The wider the pan, the more quickly moisture will evaporate from the mixture, and this is what you want when you are making jelly, jam, or marmalade.
- Place 4 saucers or small plates in the freezer. You will use these later to check the set of the marmalade.
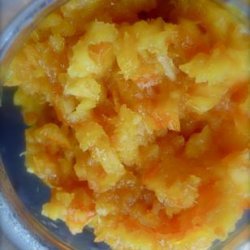
- Bring the mixture to a boil over high heat, and cook at a rapid boil over high heat until the mixture is reduced by half, stirring occasionally. It will take about 35 minutes for the mixture to reduce by half.
- Once the mixture is reduced by half, add in the strained lemon juice and the sugar, stirring well over high heat to help dissolve the sugar.
- Cook at a boil over high heat, stirring every 2 minutes or so, until the set point is reached. Check the set after 5 minutes of cooking.
- To check the set: take the pot of marmalade off the heat (if you don't remove the marmalade from the heat while you check the set it could over-cook and become rubbery or hard, if the marmalade is indeed already set).
- Place a drop of the marmalade mixture (try to get the jelly part of the mixture, avoiding the rind; I use a 1/4 teaspoon measure to dip out the drop) on one of the saucers you've kept in the freezer, & place the saucer back in the freezer for 1 minute. After 1 minute, take the saucer out of the freezer and nudge the drop of jelly with your finger. If it wrinkles when you nudge it with your finger it is done. If the jelly is not set, continue cooking over medium-high heat, checking the set again every 5 minutes.
- I make this marmalade using an 11 quart copper preserving pan, over highest heat on my second largest burner. After the sugar has been added, it usually takes 10 minutes for the marmalade to reach the set point for me.
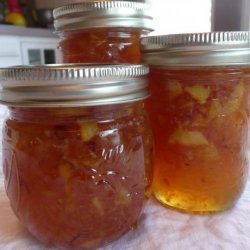
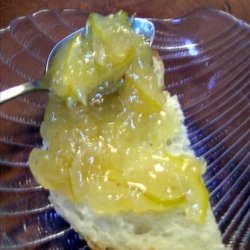
- When the marmalade is set, ladle it into sterilized canning jars, leaving 1/4 headspace. Wipe the rims of the jars with damp paper towels to remove any marmalade which got on the rims or the threads. Place the lids and the bands on the jars, just tightening the bands fingertip tight.
- Process in a boiling water bath for 5 minutes, then remove and let sit, undisturbed, for at least 12 hours before checking seals. It is important to let them sit undisturbed for 12 hours because the sealing compound on the lids is still cooling and hardening, completing the seal. While the jars cool, you will hear a plink type sound from each jar - this is the jars completing the vacuum seal as the final air escapes the jar. After 12 hours have passed, remove the bands and check the lids - press down in the center of the lid. If you cannot push the lid down any further, the jar is sealed. If the lid gives a bit, and you can push it down, the jar did not seal. You can either put the band back on the jar, and reprocess it for another 5 minutes, or you can just put it in the fridge and use it within 3 months.
Nutrition Facts
| Amount Per 1 Serving | |||
| Calories | 227.09 Kcal (951 kJ) | ||
| Calories from fat | 1.13 Kcal | ||
| % Daily Value* | |||
| Total Fat | 0.13g | 0% | |
|---|---|---|---|
| Sodium | 1.06mg | 0% | |
| Potassium | 159.39mg | 3% | |
| Total Carbs | 53.47g | 18% | |
| Sugars | 51.27g | 205% | |
| Dietary Fiber | 2.07g | 8% | |
| Protein | 0.73g | 1% | |
| Vitamin C | 48.3mg | 81% | |
| Iron | 12.1mg | 67% | |
| Calcium | 34.1mg | 3% | |
| Amount Per 100 g | |||
| Calories | 162.13 Kcal (679 kJ) | ||
| Calories from fat | 0.81 Kcal | ||
| % Daily Value* | |||
| Total Fat | 0.09g | 0% | |
|---|---|---|---|
| Sodium | 0.76mg | 0% | |
| Potassium | 113.79mg | 3% | |
| Total Carbs | 38.17g | 18% | |
| Sugars | 36.6g | 205% | |
| Dietary Fiber | 1.47g | 8% | |
| Protein | 0.52g | 1% | |
| Vitamin C | 34.5mg | 81% | |
| Iron | 8.6mg | 67% | |
| Calcium | 24.4mg | 3% | |
* Percent Daily Values are based on a 2000 calorie diet. Your daily values may be higher or lower depending on your calorie needs.
Find out how many calories should you eat.
Try this similar recipes
-
Orange Pudding Cake
Navel oranges, Sugar, All-purpose flour, Salt and 4 more.. -
Cinnamon Oranges
Navel oranges, Orange juice, Lemon juice and 2 more.. -
Cinnamon Orange
Navel oranges, Orange juice, Lemon juice, Sugar and 1 more.. -

Strawberry-Orange Melange
Navel oranges (about 2 lb), Sugar, Cornstarch and 7 more.. -

Blueberry-Orange Onion Salad
Torn salad greens, Navel oranges, peeled and sliced and 9 more.. -
Orange Crab Salad
Navel oranges, peeled and sectioned and 13 more.. -
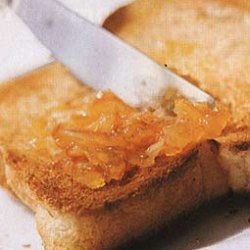
Meyer Lemon Marmalade
Meyer lemons (1 1/2 lb), Water, Sugar and 1 more.. -

Brandy Meyer Lemon Marmalade
Meyer lemons (1 1/2 lb), Water, Sugar, Brandy -
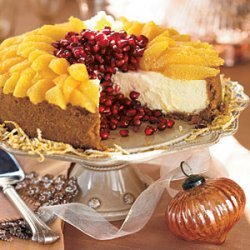
Citrus Cheesecake
Navel oranges, Sugar, Water, Sugar, Graham cracker crumbs and 11 more.. -
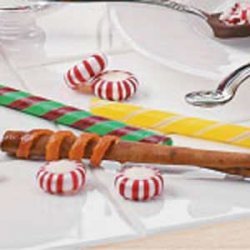
Citrus-Cinnamon Stir Sticks
Navel oranges, Sugar, Water, Cinnamon sticks (5 inches) and 1 more..
Also Try
-

-
-
-
Lemon and Dill Seasoning for Fish and Vegetables
Lemon pepper, Sugar, Dried dill, Dried chives and 5 more.. -
-

-
-
-
-
Get Your Recipe of Health!
Follow RecipeOfHealth on Facebook!
