
Directions:
- Start about 6 or 7 hours before you intend to serve the bread. Measure the flour into a large bowl. Fourteen ounces roughly equals 2 1/2 cups, but I strongly advise weighing the flour rather than measuring it out, to ensure the right flour-to-water ratio. Stir in the salt and the yeast. (I like to use Oetker, a European brand of instant yeast, but any dry yeast will do as long as you're sure it's fresh.)
- Add the water - exact precision isn't necessary, and you can simply eyeball it with a measuring cup. But since I've got the scale out anyway, I like to measure an exact 9.8 ounces (280g) to get an exact 70 percent ratio. Stir to mix by hand, or mix for a minute or so using your electric mixer's paddle attachment at low speed. This will yield a thick but rather sticky dough.
- Knead the dough for five minutes or so. As noted, this is a sticky dough, not easy to handle, so using a mixer with a dough hook attachment at medium speed is the easiest and best way to do it. If you knead by hand, use a pastry scraper and keep your hands wet to keep the dough from sticking. Avoid adding more than a small amount of extra flour, though, or you'll throw off the high water-to-flour ratio that helps get you those large holes.
- When the dough is light and smooth, put it into a tall, lightly oiled plastic or glass container with vertical sides. Cover the top with a dish towel, and use a ruler to measure the approximate depth of the dough. Put it in a cool please and leave it to rise for three or four hours, checking periodically until it rises to a full 2 1/2 times its original height. NOTE: Do not try to save time by short-cutting this step. This full rise, more than anything else, is critical to getting the classic baguette structure.
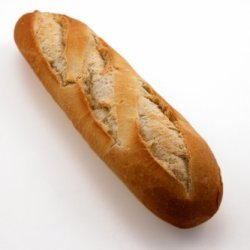
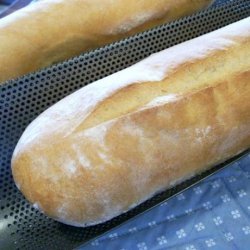
- When the dough has fully risen, pour it out onto a lightly floured bread board or counter top. Taking care not to handle or degas it any more than necessary, push it into a rough rectangle and, using a pastry scraper or heavy, sharp knife, cut it into two long portions. Line your two-loaf baguette pan with parchment paper. As gently as possible, lift each piece of dough and, letting it stretch naturally into a baguette shape, drop each piece into one of the parchment-lined channels. Cover the pan with your towel and put it in a cool place to rise until the loaves have doubled, another 60 to 90 minutes. (If you don't have a baguette pan, you can use a regular sheet pan lined with parchment paper or dusted under the loaves with a little corn meal, but the baguette pan forms pretty loaves and is a great labor-saving device.)
- While the loaves are rising, pre-heat your oven to 400F (200C). Actually, I'll usually set the pre-heat a little hotter than that to allow for some heat loss at the start of baking, turning it down to exactly 400 when I put the bread in. If you have a quarry tile baking stone or pizza stone, put it on the middle shelf before preheating. Put a small, oven-proof pan like a bread loaf pan on the bottom shelf. Fill a clean plastic spray bottle with hot water.
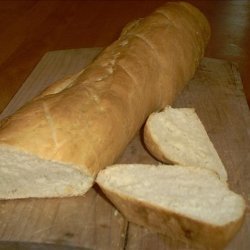
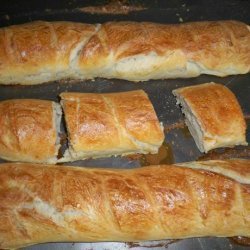
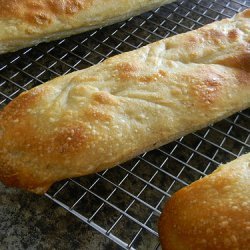
- Ready to go? Using your utility knife blade, gently cut a few diagonal slashes across the top of each loaf. Open the oven door, quickly pour 1 cup (240ml) hot water into the hot pan on the bottom shelf, taking care to avoid being burned by the blast of steam that will instantly arise. Immediately put the loaf pan on the stone (or on the shelf if you don't have a stone), and spritz the walls and the floor of the oven with the spray bottle. Close the oven door. After 30 seconds, open the door quickly and spritz again. Repeat a third and final time after another 30 seconds. Then leave the oven closed tightly for 10 minutes. At that point, turn the pan around 180 degrees to ensure even baking. If you like, the crust should now be firm enough that you can safely pop the loaves out of the parchment-lined pans and put them directly on the stone. Bake for 10 more minutes, then turn the loaves around again and let them bake for 10 more (total of 30 minutes) or until they're done. You can use the traditional baker's tricks of watching the color for a dark reddish-brown and tapping the bottoms to see if they sound hollow. The most accurate check, though, is to use an instant-read thermometer and bake until the center of the loaves registers 205 to 210F (just under 95 to 100C).
- Take the loaves out and let them cool on a rack for 30 minutes or so before dinner. Yes, I know. Melting butter on hot loaves straight from the oven is one of life's rare pleasures, and if you must, please feel free to indulge. But the texture is really best after they've had a little time to cool.
- *recipe originally from The Wine Lover's Page*
Nutrition Facts
| Amount Per 1 Serving | |||
| Calories | 0.03 Kcal (0 kJ) | ||
| Calories from fat | 0 Kcal | ||
| % Daily Value* | |||
| Total Fat | 0g | 0% | |
|---|---|---|---|
| Sodium | 47.49mg | 2% | |
| Potassium | 0.01mg | 0% | |
| Amount Per 100 g | |||
| Calories | 1.92 Kcal (8 kJ) | ||
| Calories from fat | 0 Kcal | ||
| % Daily Value* | |||
| Total Fat | 0g | 0% | |
|---|---|---|---|
| Sodium | 3120.89mg | 2% | |
| Potassium | 0.64mg | 0% | |
| Calcium | 1.9mg | 0% | |
* Percent Daily Values are based on a 2000 calorie diet. Your daily values may be higher or lower depending on your calorie needs.
Find out how many calories should you eat.
Try this similar recipes
-

Fried Buffalo Wings with Spicy, Sweet, and Umami Sauce
Water, Salt, Crushed red pepper flakes and 15 more.. -
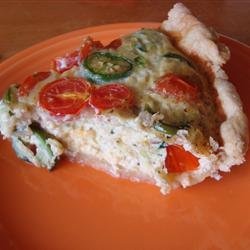
Vegetarian Quiche
Salt, Chopped zucchini, Unbaked pastry shell, Butter and 13 more.. -
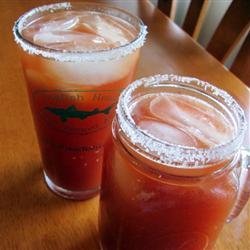
Joe's Famous Michelada
Coarse salt for rim of mug, or as needed, Ice cubes, Salt and 5 more.. -

Classic Bloody Mary
Sea salt, Ice cubes, Vodka and 6 more.. -
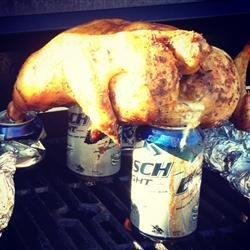
Peruvian Style Beer Can Chicken
Salt, Water, Lime, juiced, Whole chicken, Vinegar and 10 more.. -
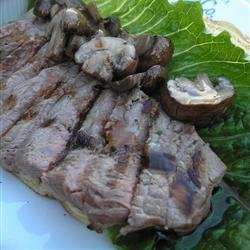
Chef John's Ultimate Steak Sandwich
Fully-trimmed flat iron steak, Salt and pepper and 11 more.. -
Italian Sausage Lasagna
Salt, Lasagna noodles, Ground italian sausage and 19 more.. -
Homemade Herb Salt
Coarse sea salt, Fresh rosemary leaves and 2 more.. -
Swiss Chard, Sausage, Pasta, and Bean Casserole
Salt, Water, Fusilli pasta and 12 more.. -
Stir-Fried Shrimp with Snow Peas and Ginger
Salt, Cold water, Shrimp, peeled and deveined and 13 more.. -
Poached Fish with Cucumbers
Salt and 8 more.. -
Brussels Sprouts in a Sherry Bacon Cream Sauce
Salt, Brussels sprouts, trimmed and halved lengthwise and 8 more.. -
Holiday Leg of Lamb
Salt, Black pepper, Seasoned salt, Dried marjoram and 6 more.. -
Original Kumla Recipe from Mom
Unsmoked bone-in ham, Salt , or to taste (optional) and 7 more.. -
Vegetarian Mexican Inspired Stuffed Peppers
Salt and 11 more.. -
Greens and Beans
Salt, Heads escarole , cut into 2-inch pieces, Olive oil and 6 more.. -
Spicy Avocado Chicken
Salt, Ground black pepper, Ground cayenne pepper and 6 more.. -
Crispy Pork Cutlets
Fully trimmed pork tenderloins, cut into 8 pieces and 15 more..
Also Try
-

-
-
-
-
-
-
Crispy French Baguettes (Levain Bakery)
Active dry yeast, Warm water (90 f), High-gluten flour and 3 more.. -
-
-
Get Your Recipe of Health!
Follow RecipeOfHealth on Facebook!
