Directions:
- Preparing Dough for Storage:.
- Warm the water slightly. It should feel just a little warmer than body temperature. Warm water will rise the dough to the right point for storage in about 2 hours. With cold water it will need 3-4 hours.
- Add the yeast to the water in a 5 quart bowl or, preferably, in a resealable, lidded (not airtight) plastic food container or food-grade bucket. Don't worry about getting it all to dissolve.
- Mix in the flour and salt - kneading is unnecessary. Add all of the flour at once, measuring it in with dry-ingredient measuring cups, by gently scooping up the flour, then sweeping the top level with a knife or spatula. Don't press down into the flour as you scoop or you'll throw off the measurement. Mix with a wooden spoon, a high-capacity food processor (14 cups or larger) fitted with the dough attachment, or a heavy duty stand mixer fitted with the dough hook until the mixture is uniform. If you're hand mixing and it becomes too difficult to incorporate all the flour with the spoon, you can reach into your mixing vessel with very wet hands and press the mixture together. Don't knead, it isn't necessary. You're finished when everything is uniformly moist, without dry patches. It takes a few minutes, and will yield a dough that is wet and loose enough to conform to the shape of its container.
- Allow to rise. Cover with lid (not airtight or it could explode the lid off). Allow the mixture to rise at room temperature until it begins to collapse (or at least flattens on the top), approx 2 hours, depending on room temperature, and initial water temperature Longer rising times, up to 5 hours, won't harm the result.
- You can use a portion of the dough any time after this period. Fully refrigerated dough is less sticky and easier to work with than dough at room temperature.
- On Baking Day:.
- Prepare your loaf tin, tray, or whatever you're baking it in/on. Sprinkle the surface of your refrigerated dough with four. Pull up and cut of a grapefruit-size piece of dough (c 1 lb), using a serrated knife.
- Hold the mass of dough in your hands and add a little more flour as needed so it won't stick to your hands. Gently stretch the surface of the dough around to the bottom on all 4 sides, rotating the ball a quarter-turn as you go. Most of the dusting flour will fall off - that's fine, it isn't meant to be incorporated. The bottom of the loaf may appear to be a collection of bunched ends, but it will sort itself out during resting and baking.
- The correctly shaped final product will be smooth and cohesive. The entire process should take no more than 30 - 60 seconds.
- Rest the loaf and let it rise in the form, on the tray/pizza peel, for about 40 minutes Depending on the age of the dough, you may not see much rise during this period. That's fine, more rising will occur during baking.
- Twenty minutes before baking, preheat the oven to 450°F Place an empty broiler tray for holding water on any other shelf that won't interfere with the rising bread.
- Dust and Slash. Dust the top of the loaf liberally with flour, which will allow the slashing knife to pass without sticking. Slash a quarter inch deep cross, diagonal lines, or tic-tac-toe pattern on top using a serrated knife.
- After a 20 min preheat you're ready to bake, even though the oven thermometer won't be at full temperature yet. Put your loaf in the oven. Pour about 1 cup of hot water (from the tap) into the broiler tray and close the oven to trap the steam.
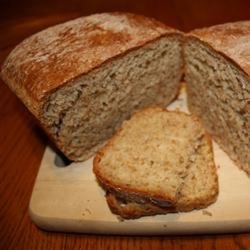
- Bake for about 30 minutes, or until the crust is nicely browned and firm to the touch.
- Store the rest of the dough in the fridge in your lidded (not airtight) container and use it over the next 14 days. The flavour and texture improves, becoming like sourdough. Even 24 hours of storage improves the flavour.
- This is the standard bread. There are loads of variations - both savory and sweet - in the book.
Nutrition Facts
| Amount Per 1 Serving | |||
| Calories | 0.62 Kcal (3 kJ) | ||
| Calories from fat | 0.03 Kcal | ||
| % Daily Value* | |||
| Total Fat | 0g | 0% | |
|---|---|---|---|
| Sodium | 407.64mg | 17% | |
| Potassium | 7mg | 0% | |
| Total Carbs | 0.07g | 0% | |
| Sugars | 0.01g | 0% | |
| Dietary Fiber | 0.02g | 0% | |
| Protein | 0.08g | 0% | |
| Calcium | 0.2mg | 0% | |
| Amount Per 100 g | |||
| Calories | 49.08 Kcal (205 kJ) | ||
| Calories from fat | 2.39 Kcal | ||
| % Daily Value* | |||
| Total Fat | 0.27g | 0% | |
|---|---|---|---|
| Sodium | 32443.77mg | 17% | |
| Potassium | 557.12mg | 0% | |
| Total Carbs | 5.31g | 0% | |
| Sugars | 0.53g | 0% | |
| Dietary Fiber | 1.86g | 0% | |
| Protein | 6.37g | 0% | |
| Iron | 1.1mg | 0% | |
| Calcium | 17.8mg | 0% | |
* Percent Daily Values are based on a 2000 calorie diet. Your daily values may be higher or lower depending on your calorie needs.
Find out how many calories should you eat.
Get Your Recipe of Health!
Follow RecipeOfHealth on Facebook!


