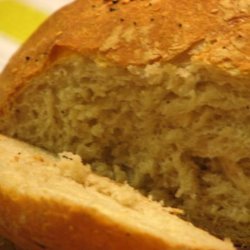
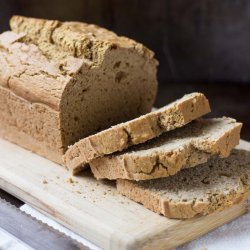
Magic Bread Box (Yeast Bread All Week With Barely Any Work) Recipe
Posted by

Directions:
- Start by putting 700g water (about 3 cups + 1 tablespoon) in a 6qt container with a lid. Just make sure it's not a screw-top container, because you want it to be able to pop off if the dough really expands or gases build up inside. But you don't want the dough to dry out during the long rise time, so you want something with a decent seal to keep in the moisture.
- Sprinkle a tablespoon of salt and 4-8 g (1-2 teaspoons) of yeast on top. The warmer it is inside where you are going to set the dough to rise, the less yeast you need. In the summer I use 4g, and the winter 8g. Great for stretching that pricey jar of yeast as far as it will go!
- Dump 1000g of unbleached all-purpose flour on top of that (approx 7-7.5 cups) and mix it up with a big spoon just until all the flour is damp. Don't knead! It's very sticky at this point, but still, more of a lump than a batter.
- Cover and let it sit out on the counter (out of the sun) all day or all night, until you can see big bubbles in the dough through the clear sides of the container and the container is almost full. For me this usually takes 6-12 hours. Recently I've found I can let it sit out just a short amount of time and then just chuck it in the fridge overnight with the same results.
- Technically it's ready to bake at that point, but I find it's very difficult to handle until it sits in the fridge for a good chunk of time first. The coolness makes it a little stiffer. So once it's risen, chuck it in the fridge for another half a day.
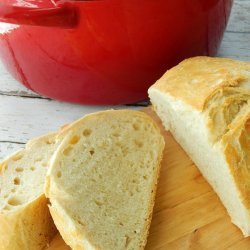
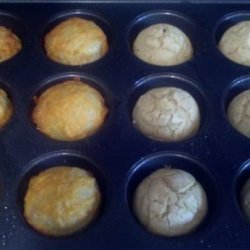
- When you're ready, sprinkle the top of the dough with a few tablespoons of flour, just to make the part where you're going to stick your fingers less sticky, but don't work it in at all. Grab the dough by the floury part, lift it partially out and cut off a piece with a bread knife. Tuck the edges underneath to form a ball (you may need to go around the edges several times) and put it on a pan sprayed with oil and dusted with cornmeal. You want to use a pan deeper than the bread is tall. A dutch oven is ideal, but I use a large loaf pan. I make about 1/5 of the dough at a time, which is about the size of an orange, but you can use less or more if you adjust baking times.
- Put the remaining dough back in the fridge, and use it all up in a 10-14 days. When you make the next batch, you can even skip cleaning the container out if you want. The little smudges of leftover flour and dough should incorporate into the new batch with no ill effects.
- Recently I've discovered that if you take an extra minute to shape the remaining dough into a ball before putting it back in the fridge, it pays huge dividends. Just pick up the whole thing and spend a minute tucking the edges under, going around and around, and then plop it back in the container. Next time you go to cut a hunk of dough off, you'll find the dough is extra bubbly, and it bakes up extra fluffy with nice big air-pocket holes in it.
- Let the newly shaped loaf sit for 30-60 minutes, then cover tightly (either with foil, or if your pan is a dutch oven with the lid) to keep in the moisture as the bread bakes. This eliminates the need for a pan of water in the bottom of the oven.
- I used to preheat, but recently I've been putting it in a cold oven with good results. The large toaster oven I use heats up pretty fast, so that may be why it works so well for me. At any rate, you want to bake at 450 for a good long time, then take the lid/foil off to brown for a little more. In my oven, for the size I make (about 1/5 of the dough at a time) that takes about 30-35 minutes, plus 5-10 for the browning. You will have to experiment with your own equipment.
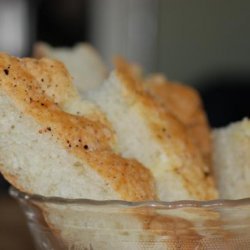
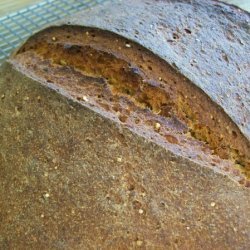
- Let it sit until it cools, then slice and enjoy! Once it's cut, it goes stale pretty quickly, so don't resist that good bread smell too long - .
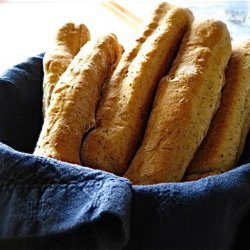
- NOTE: You can tinker with the flour any way you want. Whole wheat, rye, oatmeal, flax, wheat bran, cinnamon, etc. If you don't want to improvise, just find another recipe you like and use that with this method. See the book Artisan Bread in 5 minutes a day for other variations and options like pizza, bagels, pretzles, etc.
- NOTE2: If you want to bake all the dough at once, I recommend starting at least 24 hours in advance. Mix the dough, refrigerate for half a day, take the dough and spend a minute shaping into a ball, then put it back in the fridge for another half a day before taking it out and putting it in its final shape.
Nutrition Facts
| Amount Per 1 Serving | |||
| Calories | 456.39 Kcal (1911 kJ) | ||
| Calories from fat | 11.32 Kcal | ||
| % Daily Value* | |||
| Total Fat | 1.26g | 2% | |
|---|---|---|---|
| Sodium | 1383mg | 58% | |
| Potassium | 149.78mg | 3% | |
| Total Carbs | 95.15g | 32% | |
| Sugars | 0.02g | 0% | |
| Dietary Fiber | 3.8g | 15% | |
| Protein | 12.68g | 25% | |
| Iron | 6.3mg | 35% | |
| Calcium | 28.8mg | 3% | |
| Amount Per 100 g | |||
| Calories | 210.56 Kcal (882 kJ) | ||
| Calories from fat | 5.22 Kcal | ||
| % Daily Value* | |||
| Total Fat | 0.58g | 2% | |
|---|---|---|---|
| Sodium | 638.06mg | 58% | |
| Potassium | 69.1mg | 3% | |
| Total Carbs | 43.9g | 32% | |
| Sugars | 0.01g | 0% | |
| Dietary Fiber | 1.75g | 15% | |
| Protein | 5.85g | 25% | |
| Iron | 2.9mg | 35% | |
| Calcium | 13.3mg | 3% | |
* Percent Daily Values are based on a 2000 calorie diet. Your daily values may be higher or lower depending on your calorie needs.
Find out how many calories should you eat.
Try this similar recipes
-
Another No-Knead Bread
Water, cool, Unbleached all-purpose flour, Instant yeast and 3 more.. -

Classic Italian Bread
Warm water (not over 110 degrees ), Sugar, Yeast, Salt and 3 more.. -
No-Knead Bread
Unbleached all-purpose flour, Instant yeast, Table salt and 3 more.. -
Healthy Italian Breadsticks or Pizza Crust
Water, very warm, Brown sugar, Yeast, Salt, Olive oil and 4 more.. -
Debbie's Focaccia
Yeast (1 package .25 oz.), Sugar and 9 more.. -

Mana’eesh Bread
Unbleached all-purpose flour (2 cups), Instant yeast and 4 more.. -
Italian Sesame Bread
Unbleached all-purpose flour or 3 3/4 cups european-style... and 6 more.. -
Almost No-Knead Bread
Unbleached all-purpose flour (15 oz plus additional for d... and 5 more.. -

Soft and Fluffy White Bread
Unbleached all-purpose flour (12 3/4 oz), Instant yeast and 5 more.. -

Flatbread With Grapes
Unbleached all-purpose flour, Instant yeast, Salt, Sugar and 2 more.. -
Crusty Old World Sesame Braid
Poolish (starter ), Cool water , about 65of and 9 more.. -

Chicken & Broccoli Pizza
Water, Flour, Yeast, Salt, Olive oil, Chicken breast and 3 more.. -
The Versatile Calzone
Warm water, Wheat flour, Yeast, Salt, Oil, White flour and 14 more..
Also Try
-

Bread Machine Focaccia With Sun-Dried Tomato
Water, Bread flour, Powdered milk, White sugar, Salt and 8 more.. -
Baked Bread Machine Focaccia With the Works
All-purpose flour, Lukewarm water , plus, Lukewarm water and 20 more.. -
Carrie's Rich Rolls or Bread (Basic Recipe) With Variations
Milk, scalded, Sugar, Yeast, Eggs, Butter, Salt, Flour -
-
-
-
-

-
-
Get Your Recipe of Health!
Follow RecipeOfHealth on Facebook!
