
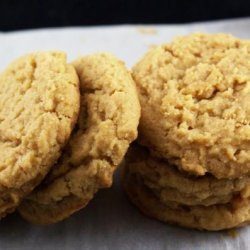
Directions:
- Place 2 oven racks in the upper and lower thirds of the oven.
- Preheat oven to 375°F.
- Food Processor Method Into a small bowl, sift together the flour, baking soda, and salt, then whisk to mix evenly. In a food processor with the metal blade, process the sugars for several minutes until very fine. Cut the butter into a few pieces and add it with the motor running. Add the peanut butter and process until smooth and creamy. Add the egg and vanilla extract and process until incorporated, scraping the sides of the bowl. Add the flour mixture and pulse in just until incorporated.
- Electric Mixer Method Soften the butter. Into a small bowl, sift together the flour, baking soda, and salt. Whisk to combine well. Set aside. In a mixing bowl, beat the sugars until well mixed. Add the butter and peanut butter and beat for several minutes, until very smooth and creamy. Add the egg and vanilla extract and beat until incorporated, scraping the sides of the bowl. At low speed, gradually beat in the flour mixture just until incorporated.
- For Both Methods Scrape the dough into a bowl and refrigerate for at least 1 hour or overnight. (This keeps the dough from cracking when shaped.)
- Measure the dough into a 1 1/4-inch cookie scoop or 2 level teaspoons and roll it between the palms of your hands to shape 1-inch balls. Place the balls 1 1/2 inches apart on the cookie sheets. As soon as you roll each ball, use your index finger or the handle of a wooden spoon to make a depression going down almost to the cookie sheet in the center of each ball.
- Bake for 10 to 12 minutes or until lightly browned and set. For even baking, rotate the cookie sheets from top to bottom and front to back halfway through the baking period.
- Cool the cookies on the sheets for a few minutes or until firm enough to lift. Use a small, angled metal spatula or pancake turner to transfer the cookies to wire racks to cool completely. If necessary, while the cookies are still hot, use the greased handle of a wooden spoon to deepen the depressions.
- Fill the centers with the cherry preserves or milk chocolate toppings.
- Cherry Preserves Topping In a microwave oven or a saucepan, heat the preserves until boiling. Strain the jelly into a small heavy saucepan. Place the cherries remaining in the strainer in the centers of the cookies. If some are crushed, piece them together.
- On medium heat, boil the jelly for about 5 minutes, stirring constantly until, when it is dropped from the stirring spoon, the last drops gather to form one large sticky drop that hangs from the spoon. The jelly will be reduced to about 3/4 cup. Allow the jelly to cool about 1 minute or until the bubbling stops. Spoon heaping 1/4 to 1/2 teaspoons over each cherry.
- Milk Chocolate Topping Break the chocolate into squares and place them in the top of a double boiler. Set it over hot but not simmering water. The water must not touch the bottom of the double-boiler insert. Stir until the chocolate begins to melt. Return the pan to low heat if the water cools, but be careful that the water does not get too hot. Stir the chocolate until smooth, and cool it until it is no longer warm to the touch. (The chocolate may be melted in a microwave oven if stirred every 15 seconds. Remove it before it is fully melted and stir, using residual heat to complete melting). Whisk in the softened butter. The mixture will immediately thicken. Do not overwhisk. Use a reclosable quart-size freezer bag with one corner cut off to pipe the chocolate into the centers of the cookies or use a small metal spatula to spread on a dollop. You can also use a coupler with a number 22 star decorating tube to pipe the chocolate decoratively into the centers. Allow the chocolate to set until firm.
- Store: Cookies filled with chocolate can be stacked in an airtight container at room temperature. Cookies with cherry centers need to be placed in single layers in airtight containers at room temperature. Do not cover the surface of the cookie with plastic wrap as the cherry center remains slightly sticky.
- Keeps: 1 month if filled, several months unfilled.
- Smart Cookie For the best texture and flavor, be sure to use commercially prepared peanut butter such as Skippy and not homemade or health food varieties, which are less smooth.
- The dry ingredients are sifted together because baking soda has a tendency to lump.
- Using superfine sugar will result in fewer cracks in the cookie's surface. It can be prepared easily in a food processor by processing granulated sugar for a few minutes or until it is as fine as sand.
- These cookies are much lighter than the usual peanut butter cookie, despite the high amount of peanut butter, because there is less flour, which offsets the bulk of the peanuts.
- For a more delicate flavor and a finer, less sandy texture, that does not crack, try a batch using half the amount of peanut butter. The cookies will also be flatter and crisper.
- Cherry preserves, straight from the jar, can be placed in the center of the unbaked cookie and baked in it, but the cookie is far less attractive.
- Allow the cookie sheet(s) to cool completely before using for the next batch.
- Distribute the cookies evenly around the cookie sheet. Avoid crowding the cookies into one section of the cookie sheet, leaving a large area bare.
- For a delicious variation that will enable you to pack the cherry variety without their sticking together, top the cherry centers with melted chocolate. Use 3 ounces of bittersweet or semisweet chocolate and 2 ounces of finely chopped milk chocolate. Melt the bittersweet chocolate as indicated for the Milk Chocolate Topping. Scrape it into a small container, immediately add the finely chopped milk chocolate, and stir until the chocolate is completely melted. Use a small spoon to cover the cherry center with the chocolate or pipe it from a reclosable quart-size freezer bag with a small piece cut from one of the corners of the bag. Place the cookies in a cool place or the refrigerator for about 5 minutes or until the chocolate is set and no longer shiny.
Nutrition Facts
| Amount Per 1 Serving | |||
| Calories | 976.22 Kcal (4087 kJ) | ||
| Calories from fat | 582.11 Kcal | ||
| % Daily Value* | |||
| Total Fat | 64.68g | 100% | |
|---|---|---|---|
| Cholesterol | 131.48mg | 44% | |
| Sodium | 385.83mg | 16% | |
| Potassium | 463.21mg | 10% | |
| Total Carbs | 89.17g | 30% | |
| Sugars | 58.85g | 235% | |
| Dietary Fiber | 4.53g | 18% | |
| Protein | 19.14g | 38% | |
| Vitamin A | 0.4mg | 13% | |
| Iron | 3mg | 17% | |
| Calcium | 112.5mg | 11% | |
| Amount Per 100 g | |||
| Calories | 413.79 Kcal (1732 kJ) | ||
| Calories from fat | 246.74 Kcal | ||
| % Daily Value* | |||
| Total Fat | 27.42g | 100% | |
|---|---|---|---|
| Cholesterol | 55.73mg | 44% | |
| Sodium | 163.54mg | 16% | |
| Potassium | 196.34mg | 10% | |
| Total Carbs | 37.8g | 30% | |
| Sugars | 24.94g | 235% | |
| Dietary Fiber | 1.92g | 18% | |
| Protein | 8.11g | 38% | |
| Vitamin A | 0.2mg | 13% | |
| Iron | 1.3mg | 17% | |
| Calcium | 47.7mg | 11% | |
* Percent Daily Values are based on a 2000 calorie diet. Your daily values may be higher or lower depending on your calorie needs.
Find out how many calories should you eat.
Try this similar recipes
-
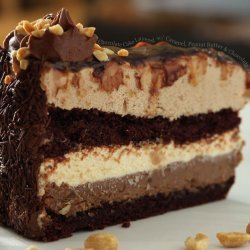
Chocolate Peanut Butter Mousse Tart
All-purpose flour, Baking soda, Salt, Light brown sugar and 14 more.. -
Mrs. Field's Soft and Chewy Peanut Butter Cookies
Flour, Baking soda, Salt, Dark brown sugar and 5 more.. -

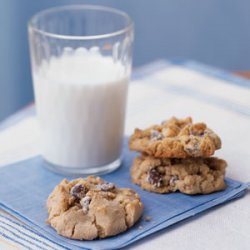
Healthy Chocolate Chip Cookies
All-purpose flour, Baking soda, Salt, Dark brown sugar and 7 more.. -

Mexican Hot Chocolate Cookies
All-purpose flour and 13 more.. -
Chocolate Chip Cookies
All-purpose flour (about 10 oz), Baking soda, Salt and 7 more..
Also Try
-

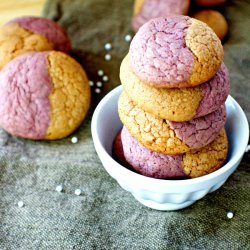
Peanut Butter and Jelly Cookies
All-purpose flour, Salt, Baking soda, Creamy peanut butter and 6 more.. -
-
-
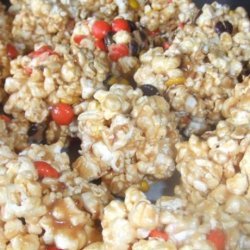
Peanut Butter Popcorn Balls With Reese's Candy
Sugar, Light corn syrup, Butter or 3 tbsp margarine and 3 more.. -
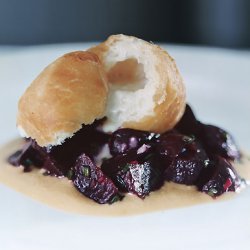
Beet Salad with Almond Butter and Gorgonzola Bomboloni
Toasted marcona almonds, Garlic clove, chopped, Cayenne and 7 more.. -
-
-
-
Brown Butter and Scallion Mashed Potatoes
Yellow-fleshed potatoes such as yukon gold, peeled and cu... and 6 more.. -
Get Your Recipe of Health!
Follow RecipeOfHealth on Facebook!
