
Directions:
- Pie Crust: In a mixer fitted with a paddle attachment (or using a hand mixer), mix the flour, salt, and sugar for 1 minute. Add the butter and mix just until you have a crumbly, sandy mixture. You should still be able to see the pieces of butter. In a small bowl, stir the water and vinegar together. With the mixer running at medium speed, drizzle in the water-vinegar mixture and mix just until a dough forms. You should still see small bits of butter.
- Turn out onto a work surface, divide the dough in 1/2, and shape into 2 round, flat disks. Wrap separately in plastic wrap and refrigerate at least 30 minutes before using. (Or, refrigerate up to 48 hours or freeze up to 1 month before using. If frozen, let thaw in the refrigerator overnight before rolling out.) When the time comes to roll out the dough, let the dough warm up for a few minutes at room temperature. Dust a work surface with just a few tablespoons of flour and keep some extra flour at hand. If you like, you can roll out the dough between 2 sheets of waxed paper (flouring the bottom sheet and the top of the dough before rolling), which makes it much easier to transfer to the pan later on. However, you won't be able to check the progress of the dough as easily. It's entirely up to you.
- Sprinkle a little flour on top of the dough and start rolling outward from the center with quick, light strokes. Don't worry if the edges split a bit; concentrate on getting a good circle going from the center. Lift up and rotate the dough 1/4 turn every minute or so to help ensure even rolling. The dough should feel smooth and soft; some say it should feel like the inside of your forearm. If it gets sticky, sprinkle on a bit more flour, but don't do this more than 2 or 3 times; the dough will absorb too much flour. Instead, put it back in refrigerator for 15 minutes to firm the butter up. Keep rolling until the circle is at least 2 inches larger than your pan (for example, 11 inches wide for a 9-inch pie pan), or 3 inches larger for deep-dish pies.
- Set your pie or tart pan nearby. We always use heavy aluminum pans, because glass pans seem to bake the crust too fast. However, we know that the advantage of glass is that you can easily check the color of the crust. Again, it's up to you. Either choice will work.
- To transfer the crust to the pan, we find it easiest to roll a finished crust up onto the rolling pin, then gently unroll it in the pan. Or, you can fold it gently in quarters, lift it up, position the center point on the center of the pan, and unfold it into the pan. If using waxed paper, peel off the top layer, turn the crust gently into the pan, and peel off the remaining paper. Make sure that the dough is allowed to settle completely into the pan.
- Don't stretch and press the dough into the corners; stretched dough will likely shrink back when you bake it. Instead, lift the edges of the crust to let it settle down into the corners. If the dough tears a bit, don't be concerned; we'll patch it in a minute. Using scissors or a sharp knife, trim the dough to within 3/4-inch of the rim. Use any extra scraps to patch the crust, pressing with your fingers (wet them if necessary) or set aside.
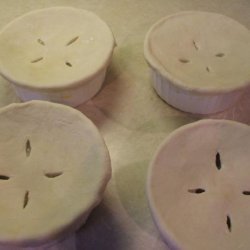
- Working around the rim, turn the crust under itself (not under the rim of the pan) to make a thick edge, pressing it firmly against the pan to reduce shrinkage. To decorate the rim, just press it all around with the back of a fork. For a slightly more advanced look, press the thumb and forefinger of one hand together. Use them to gently push the thick dough rim outward, while pushing inward with the forefinger of the other hand, so that they intersect in a V with the dough in between. Repeat all around the rim to make a wavy edge. Chill 20 minutes before baking.
- Heat the oven to 375 degrees. Line the inside of the chilled crust with aluminum foil (don't turn down over the rim, but leave the extra sticking up so that you have something to hold on to). Fill the foil all the way up to the top of the shell with pie weights, rice, or dried beans. (Pie weights are reusable metal or ceramic pellets that hold the crust in place as it bakes. You can buy them at cooking supply stores.) Bake 25 to 30 minutes, until dry and beginning to turn blond . Lift the foil and weights out of the shell and bake another 10 to 15 minutes, checking frequently to prevent overbaking, until medium brown.
- In the top half of a double boiler set over barely simmering water, stir the chocolate until melted. Using a pastry brush, brush the baked pie shell up to the rim with the melted chocolate. Set aside to cool and harden at room temperature or, uncovered, in the refrigerator. In a large saucepan, bring the milk, cream of coconut, and vanilla bean to a simmer over medium heat. Immediately turn off the heat and set aside to infuse for 15 minutes.
- Meanwhile, in a mixer fitted with a whisk attachment (or using a hand mixer), whip the egg yolks and sugar together until pale yellow and fluffy. With the mixer running at low speed, mix in the cornstarch, then gradually pour in the hot milk mixture.
- Strain the mixture back into the saucepan to smooth it and remove the vanilla bean. Whisking constantly, cook over medium-high heat until thick and just boiling. When the mixture thickens, the whisk will leave trail marks on the bottom of the pot and the mixture will have a few large bubbles boiling up to the top. Pour the mixture into a medium bowl and stir in the butter. Half-fill a large bowl with ice water. Rest the bowl containing the custard in the ice water and let cool, stirring frequently to cool the mixture. When the custard is cool, whip the cream until stiff. Fold the whipped cream and coconut into the custard. Pour the mixture into the chocolate-coated pie shell and smooth the top. Refrigerate uncovered at least 2 hours. (Or refrigerate until ready to serve, up to 24 hours.) Serve cold.
Nutrition Facts
| Amount Per 1 Serving | |||
| Calories | 21203.02 Kcal (88773 kJ) | ||
| Calories from fat | 16041.34 Kcal | ||
| % Daily Value* | |||
| Total Fat | 1782.37g | 2742% | |
|---|---|---|---|
| Cholesterol | 4383.86mg | 1461% | |
| Sodium | 13936.83mg | 581% | |
| Potassium | 4204.15mg | 89% | |
| Total Carbs | 1164.92g | 388% | |
| Sugars | 330g | 1320% | |
| Dietary Fiber | 62.19g | 249% | |
| Protein | 199.1g | 398% | |
| Vitamin C | 10mg | 17% | |
| Vitamin A | 13.8mg | 461% | |
| Iron | 64.3mg | 357% | |
| Calcium | 1962.8mg | 196% | |
| Amount Per 100 g | |||
| Calories | 422.91 Kcal (1771 kJ) | ||
| Calories from fat | 319.95 Kcal | ||
| % Daily Value* | |||
| Total Fat | 35.55g | 2742% | |
|---|---|---|---|
| Cholesterol | 87.44mg | 1461% | |
| Sodium | 277.98mg | 581% | |
| Potassium | 83.85mg | 89% | |
| Total Carbs | 23.23g | 388% | |
| Sugars | 6.58g | 1320% | |
| Dietary Fiber | 1.24g | 249% | |
| Protein | 3.97g | 398% | |
| Vitamin C | 0.2mg | 17% | |
| Vitamin A | 0.3mg | 461% | |
| Iron | 1.3mg | 357% | |
| Calcium | 39.1mg | 196% | |
* Percent Daily Values are based on a 2000 calorie diet. Your daily values may be higher or lower depending on your calorie needs.
Find out how many calories should you eat.
Try this similar recipes
-

Apple Pie As It Should Be
Plain and perfect pie crust, All-purpose flour and 17 more.. -
Seafood Pot Pie
Unsalted butter, Chopped yellow onions (1 large onion) and 18 more.. -
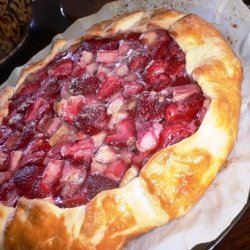
Rustic Strawberry Rhubarb Tart
Pastry crust, All-purpose flour, Kosher salt and 8 more.. -
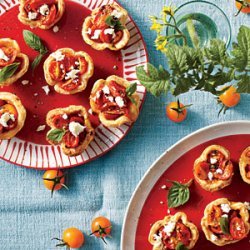
Cheese Straw Tomato Tartlets
All-purpose flour, Kosher salt, Dried crushed red pepper and 13 more.. -
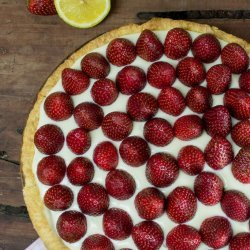
Strawberry Cream Cheese Tart
Unsalted butter, room temperature, Powdered sugar and 17 more.. -

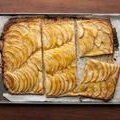
French Apple Tart
All-purpose flour, Kosher salt, Sugar and 7 more.. -
French Apple Tart (Ina Garten)
All-purpose flour, Kosher salt, Sugar and 7 more.. -

Leek & Goat Cheese Galette
Galette dough, All-purpose flour, Kosher salt and 14 more..
Also Try
-

-
-
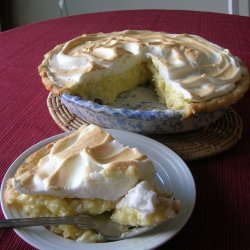
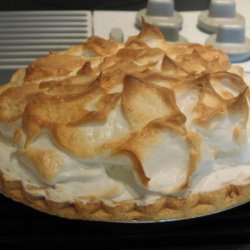
Coconut Cream Pie With Meringue Topping
Egg yolks (separated save whites for meringue) and 12 more.. -
-
-
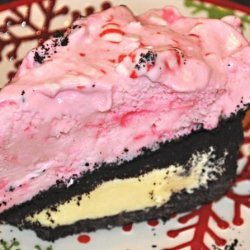
Candy Cane Ice Cream Pie With Oreo Cookie Crust
Oreo cookies, crumbled (2 cups), Butter, melted and 7 more.. -
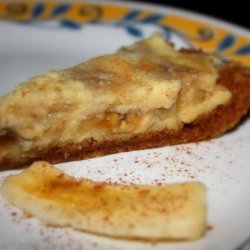
Fantastic Banana Cream Pie With Banana Graham Crust
Graham cracker crumbs, Sugar, Mashed banana and 12 more.. -
Nasoya Strawberry Cream Pie With Sugar Cookie Crust
Wheat flour, Sugar, Brown sugar, Butter, Vanilla and 5 more.. -
Banana Cream Pie with Chocolate Lining
Graham cracker crumbs, Butter, melted, Brown sugar and 11 more.. -
Old-Fashioned Banana Cream Pie With Chocolate Pastry
All-purpose flour, Sugar, Unsweetened cocoa, Salt and 13 more..
Get Your Recipe of Health!
Follow RecipeOfHealth on Facebook!
