
Ingredients:
- powdered food coloring, as needed
- fruit jewels , recipe follows
- plastic body mold from a display supply store
- tube mold , poster tube can be used
- plain plastic face mask from a party supply store
Directions:
- There are a few things to keep in mind when you start a project like this one. First, have fun. Second, the bigger the mold, the thicker the layer of chocolate.
- For the Base: There are a few options for making a chocolate base. If you have a plastic deli tray, you can pour a 1/4-inch-thick layer of white chocolate onto it. Allow it to set. When it hardens, the chocolate will retract from the sides. Simply overturn the tray being careful to support the chocolate. Remember, the chocolate base will assume any pattern that exists on the tray. Make sure the tray is big enough for the bottom of your mold. If you do not have a tray, simply use an offset spatula to spread a 1/4-inch-thick layer of tempered chocolate onto a sheet of parchment paper, being sure to spread it all the way to the edges. Lift the chocolate-covered paper by its corners and move it to a clean space on your work surface. Let the chocolate harden slightly, 4 to 5 minutes. The chocolate should be firm enough to cut but it will not be hard. Using the tip of a sharp paring knife or an X-acto knife, cut a straight edge and cut a base that is large enough to hold the mold.
- For the Support Pole: Roll a piece of parchment paper into a tube. The thickness of the tube will be determined by the size of your body mold. This piece will support the body so make sure it is long and thick enough to hold it. Set the tube on end and fill it with white chocolate. Allow this to set until hard. Pull the parchment paper with the chocolate inside out of the tube. Use white chocolate to glue the pole onto the base. Position it well so you can rest the body against it.
- For the Body: Start by drizzling both white and bittersweet chocolate in the mold. Dip your clean, dry fingers in the bowl of bittersweet chocolate and use them to spread the chocolate over the drizzles to create a marbled effect. Dipping your fingers in chocolate adds a thin layer of chocolate to the mold, which makes it easier to create the marble pattern. When the mold is marbleized, fill it with white chocolate. Pour excess chocolate back into the bowl. Place the bust upside down on a wire rack over parchment paper. Once the chocolate starts to harden, about 5 minutes, scrape the lip clean with a paring knife. Allow to harden. Using a paintbrush, paint another layer of white chocolate. Allow to harden and repeat until the chocolate is thick enough to support the structure. The inside of the bust should be evenly coated with chocolate. You will be able to see that the chocolate is ready to be unmolded when it automatically pulls away from the sides of the mold.
- (continued)
- If the chocolate is properly tempered, it will easily release from the mold. To unmold, rest your thumbs on the outside, place your first two fingers on the inside and gently begin to lift the mold from the chocolate. Do not press or pull too hard or you will break the chocolate. You will need to apply this lifting pressure to all four sides to loosen the chocolate from the mold. Use more chocolate to glue the mold onto the base.
- For the Face: Mix some red food coloring powder into a some of the melted cocoa butter. Using a small paint brush, paint the lips on the inside of the mask. Use other colors to paint the eyes, cheeks, eyebrows and any other features you desire. Allow the colors to set briefly. Use the same techniques for filling the inside of the mask as for filling the bust, except use only white chocolate. Let set and unmold. Use chocolate to glue the mask onto the body.
- For the Hair: Start by drizzling both white and bittersweet chocolate onto parchment paper. Dip your clean, dry fingers in the bowl of white chocolate and use them to spread the chocolate over the drizzles to create a marbled effect. Dipping your fingers in chocolate adds a thin layer of chocolate to the parchment, which makes it easier to create the marble pattern. Let the chocolate harden slightly, 4 to 5 minutes. The chocolate will be firm enough to cut but it will not be hard. Use the tip of a sharp paring knife to cut lengths of chocolate to represent hair. Use tempered chocolate to glue the strips onto the mask.
- Apply the fruit jewels by glueing them with chocolate onto the model. Fruit jewels can be used as a necklace and earrings. Use toothpicks to secure the earrings to the head.
- Place the applesauce, apricots, and sugar into a non-reactive 2-quart heavy-bottomed saucepan over medium-high heat. Mix together, then add the raspberries. The raspberries will dominate the flavor. If you want apricot-flavored Pate de Fruit, omit the raspberries. Using a hand-held immersion blender or whisk, combine all of the ingredients until smooth and homogenous. As the mixture cooks, the natural pectin in the fruit will cause the mixture to thicken. Continue to cook until it is thick, mixing constantly. To test for the correct consistency, dip a whisk in the mixture and hold horizontally in front of you. Watch as the mixture drips off the whisk and back into the pan. If the mixture stays on the whisk and beads up into small balls, like pearls, it is ready. If it drips back into the pan in thin strands, it needs to be cooked a little longer.
- When the mixture is a bit thicker than jam, pour it into a spouted container. Fill either a half-dome or triangle shaped flexipan, depending on the desired design of the jewels and let rest for 4 hours at room temperature. When the mixture has set, remove and roll each jewel in sugar. If you do not have a flexipan, you can pour the Pate de Fruit into a 10-inch bottomless tart mold or cake ring placed on a parchment paper-covered baking sheet. Let the Pate de Fruit cool and set, about 3 hours at room temperature. When the mixture has set, remove and roll each jewel in sugar. To unmold, run a sharp paring knife between the fruit and the mold and lift off the mold. (At this point the Pate de Fruit can be stored, well wrapped in plastic and in an airtight container, for up to 2 months.) Sprinkle the top of the Pate de Fruit with a thin layer of sugar and flip it onto another sheet of parchment paper. Remove the parchment that is now on top. Sprinkle this side with more sugar. Using a wet chef's knife or cutter, cut the Pate de Fruit into any shapes. Roll each piece completely in sugar and serve. Do not store in the refrigerator, as the humidity will make the sugar melt.
- How to Temper Chocolate(From Dessert Circus, Extraordinary Desserts You Can Make At Home by Jacques Torres):
- Chocolate is tempered so that after it has been melted, it retains its gloss and hardens again without becoming chalky and white (that happens when the molecules of fat separate and form on top of the chocolate). There are a variety of ways to temper.
- One of the easiest ways to temper chocolate is to chop it into small pieces and then place it in the microwave for 30 seconds at a time on high power until most of the chocolate is melted. Be very careful not to overheat it. (The temperature of dark chocolate should be between 88 and 90 degrees F, slightly warmer than your bottom lip. It will retain its shape even when mostly melted. White and milk chocolates melt at a temperature approximately 2 degrees F less because of the amount of lactose they contain.) Any remaining lumps will melt in the chocolate's residual heat. Use an immersion blender or whisk to break up the lumps. Usually, chocolate begins to set, or crystallize, along the side of the bowl. As it sets, mix those crystals into the melted chocolate to temper it. A glass bowl retains heat well and keeps the chocolate tempered longer.
- Another way to temper chocolate is called seeding. In this method, add small pieces of unmelted chocolate to melted chocolate. The amount of unmelted chocolate to be added depends on the temperature of the melted chocolate, but is usually 1/4 of the total amount. It is easiest to use an immersion blender for this, or a whisk.
- The classic way to temper chocolate is called tabliering. Two thirds of the melted chocolate is poured onto a marble or another cold work surface. The chocolate is spread out and worked with a spatula until its temperature is approximately 81 degrees F. At this stage, it is thick and begins to set. This tempered chocolate is then added to the remaining non-tempered chocolate and mixed thoroughly until the mass has a completely uniform temperature. If the temperature is still too high, part of the chocolate is worked further on the cold surface until the correct temperature is reached. This is a lot of work, requires a lot of room, and makes a big mess.
- A simple method of checking tempering, is to apply a small quantity of chocolate to a piece of paper or to the point of a knife. If the chocolate has been correctly tempered, it will harden evenly and show a good gloss within a few minutes.
Nutrition Facts
| Amount Per 1 Serving | |||
| Calories | 14314.85 Kcal (59933 kJ) | ||
| Calories from fat | 6340.55 Kcal | ||
| % Daily Value* | |||
| Total Fat | 704.51g | 1084% | |
|---|---|---|---|
| Cholesterol | 544.71mg | 182% | |
| Sodium | 2302.75mg | 96% | |
| Potassium | 5850.07mg | 124% | |
| Total Carbs | 1981.96g | 661% | |
| Sugars | 1841.82g | 7367% | |
| Dietary Fiber | 41.34g | 165% | |
| Protein | 140.6g | 281% | |
| Vitamin C | 60mg | 100% | |
| Iron | 10.3mg | 57% | |
| Calcium | 4293.9mg | 429% | |
| Amount Per 100 g | |||
| Calories | 389.02 Kcal (1629 kJ) | ||
| Calories from fat | 172.31 Kcal | ||
| % Daily Value* | |||
| Total Fat | 19.15g | 1084% | |
|---|---|---|---|
| Cholesterol | 14.8mg | 182% | |
| Sodium | 62.58mg | 96% | |
| Potassium | 158.98mg | 124% | |
| Total Carbs | 53.86g | 661% | |
| Sugars | 50.05g | 7367% | |
| Dietary Fiber | 1.12g | 165% | |
| Protein | 3.82g | 281% | |
| Vitamin C | 1.6mg | 100% | |
| Iron | 0.3mg | 57% | |
| Calcium | 116.7mg | 429% | |
* Percent Daily Values are based on a 2000 calorie diet. Your daily values may be higher or lower depending on your calorie needs.
Find out how many calories should you eat.
Try this similar recipes
-

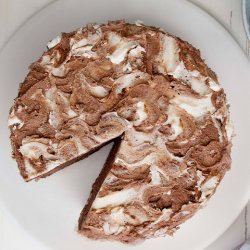
Molded Chocolate Bunny
Cocoa butter (optional), Bittersweet chocolate , tempered -
The Ultimate Valentine Cake
Imported white chocolate (such as lindt or tobler), chopp... and 19 more.. -
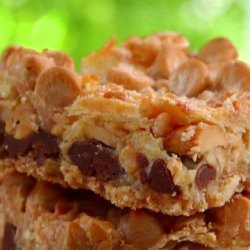
Winter Wonder Bars
White chocolate, Bittersweet chocolate, All-purpose flour and 7 more..
Also Try
-

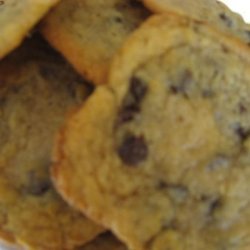
Chocolate Chip Cookies Adapted from Jacques Torres
Minus 2 tbsp cake flour (8 1/2 oz by weight) and 12 more.. -

-
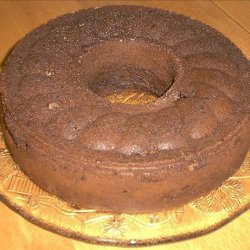
Chocolate Chocolate Chocolate Bundt Cake
Chocolate cake mix, Instant chocolate pudding mix, Cocoa and 4 more.. -
Chocolate Chocolate Pudding Cake with Chocolate Ganache
Eggs, Sugar, Sugar, Unsweetened cocoa powder, Flour and 12 more.. -
-
-
-
-

-
Chocolate Chocolate Pudding for 2
Sugar, Unsweetened cocoa powder, Cornstarch, Salt, Milk and 2 more..
Get Your Recipe of Health!
Follow RecipeOfHealth on Facebook!
