
Directions:
- To make the woven chocolate bag: I used a tall round glass container that was about 4-inches in diameter to give the front and back pieces their curve. Cover the container with parchment paper and tape it shut.
- Make the front and back: Use an offset spatula to spread a 1/4-inch-thick layer of tempered white chocolate over a sheet of acetate. Use a paring knife to cut a piece that is about 9 inches wide by 10 inches tall. You will need 2 of these pieces. Let the chocolate set slightly. While the chocolate is still pliable, curve each piece around the glass container and gently pinch the sides together. It will take a moment for the chocolate to set but this will give the bag its unique shape. When the chocolate is set, pull the glass container from the middle and peel off the acetate.
- Make the handbag base: Use an offset spatula to spread a 1/4-inch-thick layer of tempered white chocolate over a sheet of acetate. Use a paring knife to cut a base that is the shape of the space between the front and back. This is easy to do if you allow the chocolate to set slightly. Set the molded front and back on top of the chocolate and use a sharp paring knife to trace around the outside. When the chocolate is set, peel off the acetate. Use tempered chocolate to glue the piece into place at the bottom.
- Make the weaving strips: Roll out the dark molding chocolate to a 20-inch long rectangle. Use cornstarch to keep the modeling plastic from sticking to the rolling pin or the work surface. Use a sharp paring knife to cut 1-inch wide strips that are about 18 inches long. Repeat using the white molding chocolate. You will need 9 dark strips and 8 white strips for the weave. You will need 2 to 4 more strips for the handle strap, depending on the length of the strap, and a few inches for the logo.
- Weave the dark and white chocolate strips so the woven piece is slightly larger than the solid handbag. Place the handbag on its side so you can access the front. Use a pastry brush to paint a thin layer of tempered chocolate onto the front of the handbag. Carefully lift the woven piece and position it on top of the tempered chocolate, adhering it to the front of the bag. Use a sharp paring knife to trim as necessary.
- Make the logo: Weave the dark and white chocolate strips so the woven piece is about 3 inches square. Use a sharp paring knife to trim as necessary. Use a pastry brush to paint a thin layer of tempered chocolate on the back of the logo square. Press it into place on the front of the woven handbag. The tempered chocolate will act as a glue to keep the logo in place.
- Make the back cover: I used a textured piece of plastic to give the back cover a nice texture. Roll out the dark molding chocolate over the textured piece to form a 9-inch wide by 10-inch tall rectangle. Use cornstarch to keep the modeling plastic from sticking to the rolling pin or the work surface. Use the pastry brush to spread tempered chocolate onto the rolled piece. Place the handbag in the center of the rolled piece and gently pull the ends to meet the sides of the bag. Pinch the ends gently to adhere everything in place.
- Make the strap: Use the remaining strips to make the strap. Roll each color into a 1/4-inch thick rope. If necessary, you can gently pinch 2 lengths of modeling plastic together to make a longer rope. Twist the 2 colors around each other. The strap I made was about 1/2-inch wide by about 36 inches long. Use tempered chocolate to adhere the strap onto the side of the handbag, starting at the bottom.
- Make the traditional purse: If you make the pieces for this purse in the order that the recipe is written, assembly will be easy.
- To make the sides: Make a template from cardboard that is a trapezoid shape. The base is 3-inches wide. The top is 2-inches wide and the piece is 6-inches in length. Trace around the template onto a transfer sheet making 2 copies. These 2 pieces will be the sides. Use an offset spatula to spread a 1/4-inch-thick layer of tempered dark chocolate over each transfer sheet being sure to spread the chocolate beyond the edge. Let the chocolate set. When it has set completely, remove the transfer sheet.
- To make the back piece: Use a transfer sheet that is 9 inches long by 13 inches wide. Use an offset spatula to spread a 1/4-inch-thick layer of tempered dark chocolate over a transfer sheet being sure to spread the chocolate beyond the edge. Let the chocolate set slightly. Turn the rectangle so the 13-inch-wide edge is closest to you.
- While the chocolate is still pliable, set each 3-inch base of the side piece onto the chocolate rectangle positioning it so it rests at the top outside edges of the rectangle. Be sure the decorated side faces out. Pull the rectangle up and gently adhere it to the tapered edge of each side piece. Hold this for a moment while you wait for the chocolate to set. When the sides hold, position the largest face of the rectangle on the flat surface so the chocolate can cool while laying on a flat surface. When the chocolate is set, peel off the acetate.
- To make the front piece: Start with a transfer sheet that is 13 inches wide and 141/2 inches long. Trim it into trapezoid shape that is 13-inches at the base and that tapers to 6 inches wide at the top. The taper only happens in the last (top) 5 inches. Use an offset spatula to spread a 1/4-inch-thick layer of tempered dark chocolate over the transfer sheet being sure to spread the chocolate beyond the edge. Let the chocolate set slightly. Turn the transfer sheet so the widest end is closest to you and the tapered end is at the top. While the chocolate is still pliable, set the back piece at the base of the trapezoid. Pull the tapered end over the top so the purse closes.
- Make the strap: Roll out the dark molding chocolate to a 30-inch long rectangle. Use cornstarch to keep the molding plastic from sticking to the rolling pin or the work surface. Use a sharp paring knife to cut two 1-inch wide strips that are about 26 inches long. Roll each strip into a 1/4-inch thick rope. Twist the 2 ropes around each other. The strap I made was about 1/2-inch wide by about 24 inches long. Use tempered chocolate to adhere the strap to the sides of the handbag.
- SOURCE:
- Chocolate Melter: Demarle New Jersey,
- Chocolate Cold Spray: PCB in France 011 33 0388 587333
- Textured Plastic Sheet: PCB in France 011 33 0388 587333
- Lustre Dust: PCB in France 011 33 0388 587333
- Molding Plastic: Beryls
- Transfer sheets: Beryls
Nutrition Facts
| Amount Per 1 Serving | |||
| Calories | 9761.59 Kcal (40870 kJ) | ||
| Calories from fat | 4591.69 Kcal | ||
| % Daily Value* | |||
| Total Fat | 510.19g | 785% | |
|---|---|---|---|
| Cholesterol | 430.83mg | 144% | |
| Sodium | 1791.33mg | 75% | |
| Potassium | 3242.53mg | 69% | |
| Total Carbs | 1303.81g | 435% | |
| Sugars | 1167.76g | 4671% | |
| Dietary Fiber | 22.68g | 91% | |
| Protein | 102.04g | 204% | |
| Vitamin C | 11.3mg | 19% | |
| Iron | 11.3mg | 63% | |
| Calcium | 3027.1mg | 303% | |
| Amount Per 100 g | |||
| Calories | 430.5 Kcal (1802 kJ) | ||
| Calories from fat | 202.5 Kcal | ||
| % Daily Value* | |||
| Total Fat | 22.5g | 785% | |
|---|---|---|---|
| Cholesterol | 19mg | 144% | |
| Sodium | 79mg | 75% | |
| Potassium | 143mg | 69% | |
| Total Carbs | 57.5g | 435% | |
| Sugars | 51.5g | 4671% | |
| Dietary Fiber | 1g | 91% | |
| Protein | 4.5g | 204% | |
| Vitamin C | 0.5mg | 19% | |
| Iron | 0.5mg | 63% | |
| Calcium | 133.5mg | 303% | |
* Percent Daily Values are based on a 2000 calorie diet. Your daily values may be higher or lower depending on your calorie needs.
Find out how many calories should you eat.
Try this similar recipes
-
The Ultimate Valentine Cake
Imported white chocolate (such as lindt or tobler), chopp... and 19 more.. -
Winter Wonder Bars
White chocolate, Bittersweet chocolate, All-purpose flour and 7 more.. -
Winter Bark
White chocolate, chopped, Bittersweet chocolate, chopped and 1 more.. -

Hot Chocolate Passion
White chocolate, chopped, Bittersweet chocolate, chopped and 10 more.. -
Hot Chocolate Passion Dessert
White chocolate, chopped, Bittersweet chocolate, chopped and 10 more.. -
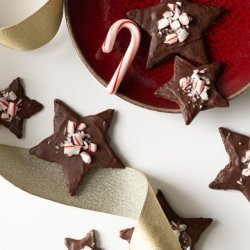
Chocolate Peppermint Stars
Buttery sugar cookie dough recipe with an addition and ad... and 3 more.. -
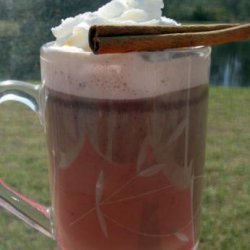
Cinnamon Mocha Coffee
Low-fat milk, Cinnamon sticks and 6 more.. -
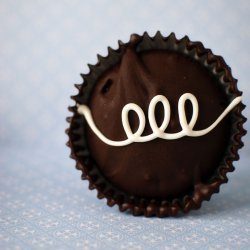
Hostess Cupcakes
Flour , plus, Flour, Cocoa powder, Baking soda, Salt and 13 more.. -

Valentine Lollipops
Safflower oil, Plastic 6-count lollipop mold (6-count ) and 5 more.. -
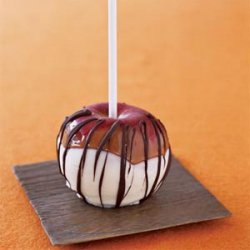
Black-and-White Caramel Apples
Apples (we prefer granny smith and fuji varieties, 6 to 8... and 4 more..
Also Try
-

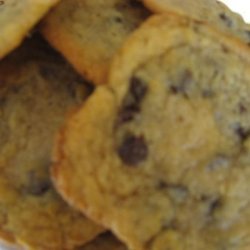
Chocolate Chip Cookies Adapted from Jacques Torres
Minus 2 tbsp cake flour (8 1/2 oz by weight) and 12 more.. -
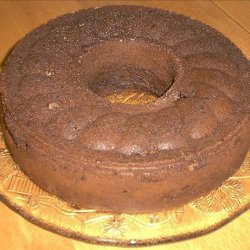
Chocolate Chocolate Chocolate Bundt Cake
Chocolate cake mix, Instant chocolate pudding mix, Cocoa and 4 more.. -
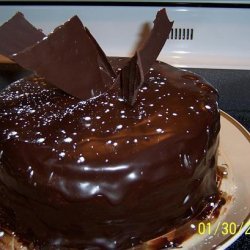
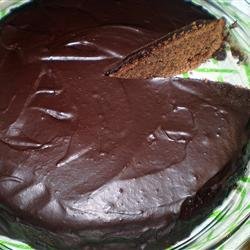
Chocolate Chocolate Pudding Cake with Chocolate Ganache
Eggs, Sugar, Sugar, Unsweetened cocoa powder, Flour and 12 more.. -
-
-
-
-
-
Chocolate Chocolate Pudding for 2
Sugar, Unsweetened cocoa powder, Cornstarch, Salt, Milk and 2 more.. -
Chocolate Chocolate Chip Cupcakes
All-purpose flour, Unsweetened cocoa powder , sifted and 11 more..
Get Your Recipe of Health!
Follow RecipeOfHealth on Facebook!
