
Ingredients:
- how to temper chocolate
- from dessert circus, extraordinary desserts you can make at home by jacques torres
- chocolate is tempered so that after it has been melted, it retains its gloss and hardens again without becoming chalky and white (that happens when the molecules of fat separate and form on top of the chocolate). there are a variety of ways to temper.
- 1 of the easiest ways to temper chocolate is to chop it into small pieces and then place it in the microwave for 30 seconds at a time on high power until most of the chocolate is melted. be very careful not to overheat it. (the temperature of dark chocolate should be between 88 and 90 degrees f, slightly warmer than your bottom lip. it will retain its shape even when mostly melted. white and milk chocolates melt at a temperature approximately 2 degrees f less because of the amount of lactose they contain.) any remaining lumps will melt in the chocolate's residual heat. use an immersion blender or whisk to break up the lumps. usually, chocolate begins to set, or crystallize, along the side of the bowl. as it sets, mix those crystals into the melted chocolate to temper it. a glass bowl retains heat well and keeps the chocolate tempered longer.
- another way
- the classic way to temper chocolate is called tabliering. two thirds of the melted chocolate is poured onto a marble or another cold work surface. the chocolate is spread out and worked with a spatula until its temperature is approximately 81 degrees f. at this stage, it is thick and begins to set. this tempered chocolate is then added to the remaining non-tempered chocolate and mixed thoroughly until the mass has a completely uniform temperature. if the temperature is still too high, part of the chocolate is worked further on the cold surface until the correct temperature is reached. this is a lot of work, requires a lot of room, and makes a big mess.
- a simple method of checking tempering, is to apply a small quantity of chocolate to a piece of paper or to the point of a knife. if the chocolate has been correctly tempered, it will harden evenly and show a good gloss within a few minutes.
Directions:
- Form a piece of acetate that is 18 by 24 inches into a cone. Use the width (18 inches) of the piece of acetate to be the length of the finished cone. While rolling hold the tip so that it is as tight as you can make it. Tape the cone closed where necessary. With scissors trim the open end of the cone so that it is flat. Place the cone in a vase or some tall container that allows it to stand upright. Use a ladle to fill the cone with the tempered chocolate. Empty the cone of excess chocolate by flipping it over the bowl of tempered chocolate. Set on a baking sheet fitted with a baking rack so the chocolate can continue to drain. When the chocolate has drained, place the cone in the refrigerator or let cool at cool room temperature until set. Repeat this process 1 more time in order to achieve thick, more stable chocolate cone walls.
- Pour tempered chocolate onto a sheet of acetate that is on your work surface. Spread the chocolate so it is a minimum of 1/4-inch thick. Allow it to set slightly. When the chocolate has begun to set but is not yet hard, cut a round base on which to glue the cone. The size of the round base will be determined by how tightly you wrapped your cone. The tighter the cone is wrapped the smaller the diameter of the cone's bottom. You can measure the diameter of your cone and add 4 inches, which should leave you with a base that will have a wide rim around your cone. Next, cut the concentric rings that will fit on the cone. I used cake rings, cookie cutters and piping tips to make the concentric circles and the inside cut-outs. Again, the size of concentric rings is determined by the cone that you made. Make at least 3 concentric rings and remember, the larger rings will have to have the larger cut-outs so they can slide towards the base of your cone. You may need to repeat this procedure to make additional circles.
- Unwrap the cone from the acetate. Use tempered chocolate to adhere the cone to the base, placing it in the center of the circle. Slide the concentric rings onto the cone. Arrange the Wagashi pastry on the circles.
Nutrition Facts
| Amount Per 1 Serving | |||
| Calories | 5842.37 Kcal (24461 kJ) | ||
| Calories from fat | 2122.85 Kcal | ||
| % Daily Value* | |||
| Total Fat | 235.87g | 363% | |
|---|---|---|---|
| Cholesterol | 308.45mg | 103% | |
| Sodium | 1233.79mg | 51% | |
| Total Carbs | 1016.06g | 339% | |
| Sugars | 798.34g | 3193% | |
| Dietary Fiber | 36.29g | 145% | |
| Protein | 54.43g | 109% | |
| Iron | 18.1mg | 101% | |
| Calcium | 1233.8mg | 123% | |
| Amount Per 100 g | |||
| Calories | 322 Kcal (1348 kJ) | ||
| Calories from fat | 117 Kcal | ||
| % Daily Value* | |||
| Total Fat | 13g | 363% | |
|---|---|---|---|
| Cholesterol | 17mg | 103% | |
| Sodium | 68mg | 51% | |
| Total Carbs | 56g | 339% | |
| Sugars | 44g | 3193% | |
| Dietary Fiber | 2g | 145% | |
| Protein | 3g | 109% | |
| Iron | 1mg | 101% | |
| Calcium | 68mg | 123% | |
* Percent Daily Values are based on a 2000 calorie diet. Your daily values may be higher or lower depending on your calorie needs.
Find out how many calories should you eat.
Try this similar recipes
-
15th Century Custard Tart
Old way and 6 more.. -
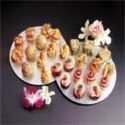
How Many Hors Douevresperson
How to estimate food quantities and 48 more.. -
Tamale Wrap Instructions
How to wrap a tamale, Time required : 2 minutes per tamale and 19 more.. -
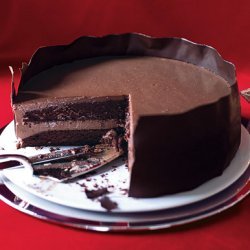
Chocolate Panna Cotta Layer Cake
Nonstick vegetable oil spray and 23 more.. -
Black Forest 'strata'
Bittersweet chocolate, coarsely chopped, All-purpose flour and 16 more.. -
Triple Chocolate Cake
Bittersweet chocolate, roughly chopped, Unsalted butter and 19 more.. -
Little French Fudge Cakes
Bittersweet chocolate bar, chopped and 10 more.. -
Willie Cake
Bittersweet chocolate, chopped, Unsalted butter, cubed and 7 more.. -
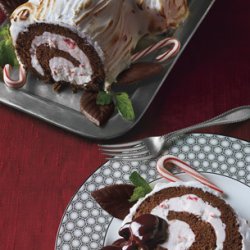
Frozen Chocolate-Peppermint Bùche de Noël
Bittersweet chocolate (do not exceed 61% cacao), chopped and 22 more.. -
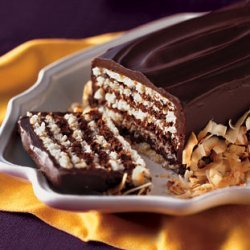
Coconut-Chocolate Marjolaine
Bittersweet (not unsweetened ) or semisweet chocolate, ch... and 12 more.. -
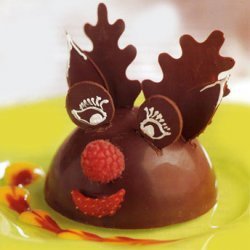
Chocolate Moose
Bittersweet chocolate , tempered and 10 more..
Also Try
-

Chocolate Chip Cookies Adapted from Jacques Torres
Minus 2 tbsp cake flour (8 1/2 oz by weight) and 12 more.. -
Chocolate Chocolate Chocolate Bundt Cake
Chocolate cake mix, Instant chocolate pudding mix, Cocoa and 4 more.. -
Chocolate Chocolate Pudding Cake with Chocolate Ganache
Eggs, Sugar, Sugar, Unsweetened cocoa powder, Flour and 12 more.. -
-
-
-
-
-
Chocolate Chocolate Pudding for 2
Sugar, Unsweetened cocoa powder, Cornstarch, Salt, Milk and 2 more.. -
Chocolate Chocolate Chip Cupcakes
All-purpose flour, Unsweetened cocoa powder , sifted and 11 more..
Get Your Recipe of Health!
Follow RecipeOfHealth on Facebook!
