10 perfection oven Recipes
Browse:
- perfection
- oven
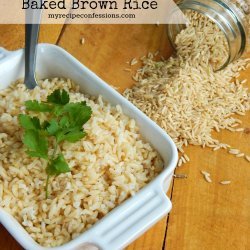
- perfect baked brown rice
- perfect baked potatoes grill
- baked perfect
- baked rice perfect
-
 butter ( preferred or crisco - not lard or margarine) and8 Morebutter ( preferred or crisco - not lard or margarine), brown sugar, well beaten eggs, vanilla, cake flour, salt, fine chopped pecans, equipment needed, wooden spoon , working oven on 325 degrees, cookie cooling racks, mix master10 min, 9 ingredients
 -
-
-
 egg yolks, freshly-squeezed lemon juice and9 Moreegg yolks, freshly-squeezed lemon juice, unsalted butter , cut into pieces, white wine, white vinegar, coarse salt and pepper to taste, toast english muffin slices under the broiler or in the oven for approximately 3 minutes or until golden brown. remove from broiler, spread with 1 tsp butter. in a large frying pan, cook ham or canadian bacon slices until lightly browned and place them on each english muffin half., if you can poach an egg read no further, use a pan that is at least 3-inches deep so there is enough water to cover the eggs and they do not stick to the bottom of the pan. note: to prevent sticking, grease the pan with a little oil before filling with water. add vinegar and salt to the poaching liquid; bring the poaching liquid to a boil and then reduce to a simmer before adding the eggs (bubbles should not break the surface). hint: when you poach eggs, adding a little vinegar and salt to the water will helps the egg to hold its shape. without it, the eggs will become skeins of protein tangling up in the water., break each egg onto a saucer or into small cups or bowls. slip eggs carefully into simmering water by lowering the lip of each egg-cup 1/2-inch below the surface of the water. let the eggs flow out. immediately cover with a lid and turn off the heat. set a timer for exactly three minutes for medium-firm yolks. adjust the time up or down for runnier or firmer yolks. cook 3 to 5 minutes, depending on firmness desired., water with slotted spoon. lift each perfectly poached egg from the with a slotted spoon, but hold it over the skillet briefly to let any clinging to the egg drain off. drain well before serving. top each english muffin half with 1 poached egg. spoon warm hollandaise sauce over eggs and garnished with a small parsley sprig or chopped chives.5 min, 11 ingredients
 -
 everywhere you look , there is a lot of emphasis on cutti... and8 Moreeverywhere you look , there is a lot of emphasis on cutting the fat out of our daily diets, but who wants to cut out the fat if it means cutting out the flavor when it comes to baking, there is a way to cut down on your fat intake without changing the ingredients in your favorite recipes. if you switch to nonstick silicone bakeware, you can cut down on your fat intake with minimal effort. because the bakeware is nonstick, you never have to use butter, shortening, or grease on your pans or sheets to ensure easy food removal., first silicone items made exclusively for baking were small silicone mats that fit nicely on your cookie sheet and allowed you to bake cookies with out greasing the cookie sheet or worrying about the bottoms getting burned. these little mats were a huge success and stores were hard pressed to keep them in stock., as the popularity of these mats grew , manufacturers decide to explore the idea of making more bakeware from silicone. they began making spoons, spatulas, and whisks that could withstand high heats and could be used with nonstick cookware with no fear of ruining the coating. silicone utensils were the perfect choice for candy making or any other project that required a boiling and sticky liquid to be stirred., kitchen supply manufacturers also introduced silicone potholders and oven gloves. because they can withstand heats up to 500 degrees, they are the perfect insurance that you won tsp get burned when you pull a hot dish from your oven. they don tsp conduct heat the way that a cloth potholder does and they are much sturdier and easy to keep clean than traditional potholders. home canners fell in love with silicone baker s mitts because they could actually reach into a pot of boiling water to remove a hot jar of food once it was done processing. as an added bonus these durable potholders do double duty as lid grippers making opening jars a snap., once silicone hit kitchens in the form of baking mats , utensils, and pot holders, kitchen experts began to see the potential of this material in everyday baking. suddenly almost any type of bakeware that could traditionally be found in stainless steel, aluminum, glass, or stoneware was being offered in brightly colored silicone. stores began selling muffin tins, bread loaf pans, cake pans, and pie pans. the most popular pieces tend to be the specialty designed cake pans that allow you to make cakes shaped like everything from roses to pumpkins. they even have mini cake pans that make individual, fancy shaped cakes., popularity of silicone bakeware skyrocketed as cooks began to see the benefits of using this material in their kitchens. foods pop out of silicone pans with amazing ease. you never need to grease, flour, or even use cooking spray on a silicone pan and that adds up to lots of calories and fat grams saved with each meal. because silicone is very flexible, it is easy to bend and twist it so that cakes and breads pop out easily. you never have to force baked goods out of the pan, so they retain there shape and you don tsp see a lot of split and broken cakes., silicone is a bakers dream when it comes to making evenly cooked delicacies. the material distributes heat evenly, so you never end up with a cake that is burned around the edges and still not cooked in the middle. it also cools down quickly ensuring that your foods will not continue cooking and possibly drying out once you remove them from the oven., because silicone is nonstick , cleanup is a breeze. a little soap and water and any crumb left on your bakeware disappears. it is nonporous, so it never retains any odors from the foods you cook. completely versatile it goes from oven to table to freezer and can even be thrown in the dishwasher. once you are done cleaning it, storage is a snap. with its flexibility, you can twist it, bend it, fold it or mash it up so it can fit in the smallest of drawers or cupboards., if you haven tsp tried silicone bakeware , add a piece or two to your kitchen. you will be surprised at its quality and flexibility.9 ingredients
Related searches:
- oven baked perfect
- oven baked rice perfect
- perfect baked potatoes oven grill
- perfect oven baked brown rice
- perfect
- perfect pies
- perfect bread recipe
- perfect pumpkin
- perfect chocolate chip cookies
- perfectly peach
- dutch oven
- easy bake oven
- oven fried chicken
- toaster oven
- perfect hard boiled eggs
- convection oven
- nuwave oven
- pizza oven
- oven baked chicken
- brick oven pizza

