
Ingredients:
- use these general directions as a guide when making fruit curds. recipes vary, so for best results, follow each 1 carefully.
- 1. in the top pan of a double boiler or in a nonreactive saucepan, whisk together the eggs and sugar until well blended.
- 2. whisk in the fruit juice until smooth and blended. (at first the mixture may look curdled, but it will become smooth as it is whisked.)
- 3. set the top pan over but not touching simmering water in the bottom pan, or set the saucepan over medium-low heat. (if using a saucepan, take care not to heat the mixture too quickly.) cook, stirring constantly with a wooden spatula or spoon, until the mixture is warmed through, 1 to 2 minutes.
- 4. begin adding softened butter 1 to 2 tbsp. at a time, stirring each addition until blended before adding more.
- 5. continue cooking, stirring constantly and scraping the bottom of the pan, until a finger drawn across the back of the spatula leaves a path, 8 to 10 minutes more. immediately remove the pan from the heat.
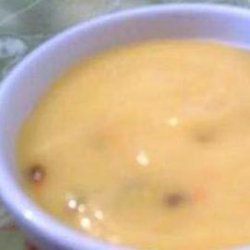
- 6. pass the curd through a chinois or other fine-mesh sieve set over a nonreactive bowl and let cool to room temperature.
Directions:
- Tips for Successful Fruit Curds
- • If you do not have a double boiler, whisk the ingredients in a large, heavy-duty stainless-steel or other nonreactive bowl, and set the bowl over a saucepan of simmering water.
- • Fruit juice is generally high in acidity, so cooking the curd in a nonreactive saucepan or bowl prevents the curd from developing a metallic flavor.
- • Because curds contains eggs, cook over gentle heat while stirring constantly. This will prevent the eggs from cooking too fast and scrambling.
- • A flat-edged wooden spatula is the best utensil for stirring a curd. It is ideal for continuously scraping the bottom of the pan to ensure the curd cooks at an even rate.
- • A sauce whisk is also an excellent tool. As you constantly scrape the pan bottom, the whisk will help blend the sauce, producing a delicately smooth curd.
- • Eggs begin to thicken at 160°F and will curdle or scramble at a temperature over 180°F. As the curd nears doneness, it will thicken and lighten in color. The curd is done when a candy thermometer registers 170°F or a finger drawn across the back of the spatula leaves a path. If using a whisk, the curd will leave thin trails as the whisk passes through the mixture with each stroke. Immediately remove the pan from the heat to prevent the curd from cooking further. Do not allow the curd to boil.
- • Passing the cooked curd through a fine-mesh sieve set over a bowl ensures a silky-smooth texture.
- • If preparing the curd for later use, lay a piece of plastic wrap over the top and press it gently onto the surface to prevent a skin from forming on the top. Refrigerate until well chilled, at least 4 hours. The curd will stay fresh for up to 2 weeks.
Nutrition Facts
| Amount Per 1 Serving | |||
| Calories | 0 Kcal (0 kJ) | ||
| Calories from fat | 0 Kcal | ||
| % Daily Value* | |||
| Total Fat | 0g | 0% | |
|---|---|---|---|
| Amount Per 100 g | |||
| Calories | 0 Kcal (0 kJ) | ||
| Calories from fat | 0 Kcal | ||
| % Daily Value* | |||
| Total Fat | 0g | 0% | |
|---|---|---|---|
* Percent Daily Values are based on a 2000 calorie diet. Your daily values may be higher or lower depending on your calorie needs.
Find out how many calories should you eat.
Also Try

Get Your Recipe of Health!
Follow RecipeOfHealth on Facebook!
