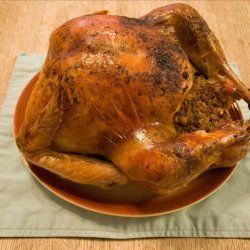
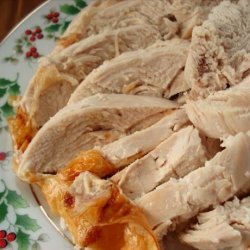
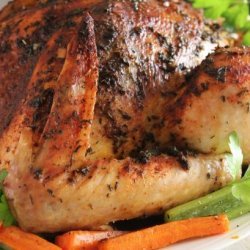
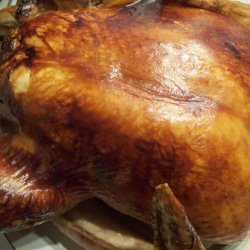
Most Perfect Moist-Est Tender-Est Juici-Est Roast Turkey-Ever! Recipe
Posted by

Directions:
- Prep: Two days before cooking:.
- Turkey must be thoroughly thawed before preparing for the oven unless you are using a fresh turkey.
- I finished thawing mine using the cold water method two days before cooking.
- Remove turkey parts from cavities and use as you desire.
- Wash cavities well with cold water and drain as well as you can.
- Snake your hand carefully between the skin and meat to create a pocket in which to put the spices. I got up to the neck, although didn't break through, and down the sides to the hip joint. I also made a pocket in the inner thigh of each leg. I really took my time with this so I wouldn't break through the skin. I didn't do the back, but I suppose you could?.
- Mix Salt, Pepper, Garlic powder and Onion powder in a bowl.
- Using a spoonful of this mixture at a time in your hand, reach in to the pockets you have created and rub into the bird, and some in the cavity as well. When all the mixture has been used, move your hands around on the outside of the skin, and massage the bird to break up the tissues to allow the meat to absorb the rub.
- Place the whole bird in a large SEALED food safe bag. I used a Reynolds Oven Bag-Turkey Size. Refrigerate turkey for 1-2 days (I refrigerated mine for about 36 hours). (Note: I don't use the oven bag to cook the bird!).
- On the day you will serve the bird, preheat oven to 400°F I know this sounds nuts, just go with it!
- Prepare a roasting pan with a rack. I greased my rack with bacon grease. Mmmmm - bacon - !
- Pour 3 cups of chicken broth in the pan.
- On the stovetop, boil about 2-3 quarts water (must be scalding hot.).
- Remove the turkey from the oven bag (which you can now throw away) and place the bird in a clean sink.
- Pour hot water over the entire turkey including in the cavities. The skin will shrink tightly to the turkey, squishing in that yummy rub you put in 2 days ago! It will also help hold the natural juices in the turkey while it is cooking. I poured half of the water on the bird's back, then turned it over to pour on the breast.
- I did not stuff my bird, and since I've never stuffed a turkey, I'll defer to Uncle Bill here, and he states in his recipe to stuff the bird, line the inside of the cavity with cheesecloth, then stuff LOOSELY with your favorite dressing.
- Tie legs with a good meat wrapping twine. Alternately, some birds have a spot pre-cut at the base of their spine to push their legs through.
- Lightly salt and pepper the outside of the bird, front and back.
- Drizzle 1/4 cup olive oil across the front of the bird. Using a basting brush, your hand or a paper towel, lightly coat the bird, careful not to remove the salt and pepper (I suppose you could do these steps the other way, this is just how I did it.).
- Place the bird BACK SIDE UP (really, trust me!) on the rack. I'll warn you, this will leave lines in the breast of your bird, but a beautiful bird that's dry and tasteless is NOT going to make you the holiday hero!
- Pour the other 1/4 c of olive oil on the back of the bird, and using a basting brush, your hand or a paper towel, lightly coat the bird.
- Cover the turkey completely with aluminum foil, pinching the foil tightly to the roasting pan which will create a wonderful moist, hot, convection within the pan. Be careful to tent the foil enough so it doesn't touch the bird (it will stick) or use a layer of the non-stick foil to avoid this problem.
- Place turkey on lower rack in oven and cook for 1 hour.
- Reduce heat to 325 F and continue to cook for 45 minutes.
- Now, flip the bird over! This might take two people. My hubby used heavy work gloves covered with Ziploc bags. It was a sight! Make sure you have the roasting pan on a steady level surface where it won't slip around. Some folks talk about doing this with the pan placed on the floor.
- Re-cover and pinch the foil back down (as best you can since your pan will be hot!) Be sure to keep it from touching the bird, or use the layer of non-stick foil if you have it.
- Continue cooking the bird covered for another 90 minutes.
- Remove the foil and baste the bird. Leave a triangle-shaped piece of the non-stick foil over the breast, but leave the legs exposed. The dark meat takes longer to cook through, and covering the breast (supposedly) helps keep the leaner white meat protected from drying out.
- Baste every 15-20 minutes for the next 45 minutes.
- Take a temp reading using a meat thermometer in the thickest part of the breast, and another spot in the thickest part of the thigh, without touching bone. You want a reading of 155°F If you aren't there, continue to cook the bird until you reach 155°F
- When you reach a reading of 155°F, remove the bird, baste once more, and cover it again with foil. WAIT 30 MINUTES BEFORE CARVING. During this 30 minutes, carryover cooking will continue and the temperature of the bird will continue to rise. Safe cooked temperature for a turkey is 165°F as of this writing. If you make the mistake of cooking to 165° or heaven forbid 175°, you risk turning your beautiful turkey into something that's tragically desiccated.
- There is no need to baste the turkey until the last part of cooking, this saves you a lot of time as you do not have to remove the foil tent during the first few hours, and you will keep your oven at a more consistent cooking temperature allowing your bird to cook faster.
- These are Uncle Bill's COOKING TIMES (my 21.5 pound bird was in the oven 4 1/2 hours so I think these might be a bit long, but it may depend on your oven. I would err on checking the bird sooner rather than later - you can't uncook something!).
- Left Side -Stuffed- Right Side - Unstuffed.
- *12-14lbs.: 4 - 4 1/2 hours- 3 1/2 - 3 3/4 hours.
- *14-16lbs.: 4 1/2 - 5 hours- 3 3/4 - 4 hours.
- *16-18lbs.: 5- 5 1/2 hours- 3 3/4 - 4 1/4 hours.
- *18-20lbs.: 5 1/2 - 6 hours- 4 1/4 - 4 1/2 hours.
- *20-22lbs.: 6 - 6 1/4 hours- 4 1/2 - 5 hours.
- *22-24lbs.: 6 1/4- 6 1/2 hours- 5 - 5 1/4 hours.
Nutrition Facts
| Amount Per 1 Serving | |||
| Calories | 91.88 Kcal (385 kJ) | ||
| Calories from fat | 65.66 Kcal | ||
| % Daily Value* | |||
| Total Fat | 7.3g | 11% | |
|---|---|---|---|
| Cholesterol | 16.33mg | 5% | |
| Sodium | 504.46mg | 21% | |
| Potassium | 99.02mg | 2% | |
| Total Carbs | 1.33g | 0% | |
| Sugars | 0.07g | 0% | |
| Dietary Fiber | 0.22g | 1% | |
| Protein | 5.23g | 10% | |
| Vitamin C | 2.6mg | 4% | |
| Iron | 0.3mg | 2% | |
| Calcium | 8.8mg | 1% | |
| Amount Per 100 g | |||
| Calories | 138.13 Kcal (578 kJ) | ||
| Calories from fat | 98.71 Kcal | ||
| % Daily Value* | |||
| Total Fat | 10.97g | 11% | |
|---|---|---|---|
| Cholesterol | 24.54mg | 5% | |
| Sodium | 758.42mg | 21% | |
| Potassium | 148.87mg | 2% | |
| Total Carbs | 1.99g | 0% | |
| Sugars | 0.1g | 0% | |
| Dietary Fiber | 0.33g | 1% | |
| Protein | 7.87g | 10% | |
| Vitamin C | 4mg | 4% | |
| Iron | 0.5mg | 2% | |
| Calcium | 13.2mg | 1% | |
* Percent Daily Values are based on a 2000 calorie diet. Your daily values may be higher or lower depending on your calorie needs.
Find out how many calories should you eat.
Try this similar recipes
-
Uncle Bill's Method for Cooking Turkey
Whole turkey, Salt, Pepper, Granulated garlic powder and 2 more.. -

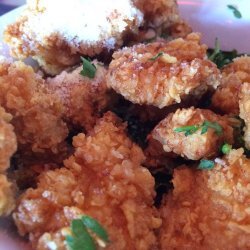
Jive Turkey Deep-Fried Turkey
Peanut oil, Turkey, thawed, Salt, Pepper, Garlic powder -
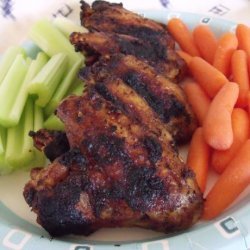
Smoky Grilled Pork Chops
Seasoned salt (such as lawry's), Ground black pepper and 6 more.. -
Greek Seasoning
Sea salt, Cracked black pepper, Garlic powder and 10 more.. -
Popeyes Cajun Sparkle
Salt, Ground black pepper, Garlic powder, Onion powder and 4 more.. -
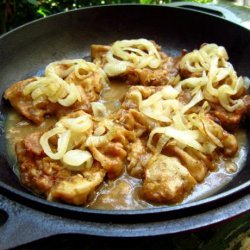
Smothered Steak Deeply Southern
Salt, Black pepper, Garlic powder, Onion powder and 6 more.. -
Smokey Spiced Chicken Wings
Seasoning salt, Black pepper, Garlic powder, Onion powder and 10 more.. -
Fried Alligator Tail
Alligator tail steaks (steaks or chunks), Salt, Pepper and 6 more.. -
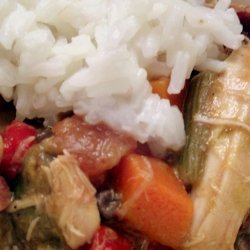
Chicken and Sausage Gumbo
Salt, Pepper, Garlic powder, Onion powder, Gumbo file and 11 more.. -
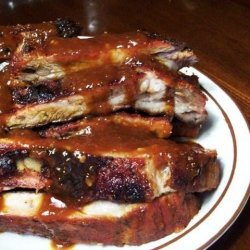
Smoky Sweet Spareribs With Sauce and Beans
Vegetable oil, Onion, chopped fine (about 2 cups) and 24 more..
Also Try
-

-
-
Moist and Tender Turkey Breast
Fresh or frozen turkey breast (thawed ) or 1 (5 -20 lb) t... and 3 more.. -

Moist and Tender Turkey With Gravy
Chicken broth, Water, Stalks celery, cut into large pieces and 6 more.. -
-
-
-
-
-
Get Your Recipe of Health!
Follow RecipeOfHealth on Facebook!
